
A beginner garden layout is the plan that turns available space into rows, beds, or containers a first-time grower can actually maintain.
Light and water access are fixed; soil can be amended, but a hose that does not reach or shade that creeps in by afternoon will undermine every choice that follows.
I start every layout by watching the candidate spot for a full day, marking sun edges with rocks, before I commit a single seed.
Choose a Location

Most vegetables need 6 to 8 hours of direct sun each day, and that requirement narrows your options faster than anything else on the list. Soil can be fixed with compost.
Slope can be terraced. Shade from a fence or a neighbor’s oak cannot be moved, and hauling water across a yard gets old by July.
I start every layout by watching the candidate spot for a full day before I commit.
A corner that looks bright at 10 a.m. can fall into shadow by 2 p.m. once the sun tracks across the roofline. Water access matters the same way.
A bed positioned more than a hose-length from the spigot means carrying cans or installing irrigation you did not budget for, and inconsistent watering shows up as blossom drop or bitter greens later in the season.
Well-drained soil is worth wanting, but it is not the deciding factor.
Heavy clay or compacted ground gets broken up with compost worked in each fall and spring. Light and water are the infrastructure; everything else is renovation.
Measure and Map the Space

A 4×8 foot bed or a 10×10 foot plot, right around 100 square feet, is the size I would actually start with if I were doing this for the first time this weekend.
The 4×8 keeps the work reachable from both sides without stepping into the soil, and the 10×10 gives you room to learn how plants fill a space without turning into a maintenance job that eats your Saturday mornings.
Paper mapping beats apps for the same reason paper beats screens for crosswords: your hand moves slower than your thumb, and the slowness catches mistakes.
I use graph paper at one inch to one foot, cut to the real dimensions of my space, and sketch in the mature spread of each plant before anything goes in the ground.
A tomato that needs two feet reads very differently on paper than it does in your head, and moving a pencil eraser is cheaper than moving a dug-in root ball.
You can always make your garden bigger next year once you better understand the time and resources needed.
That last part matters most to me. The first season teaches you how much weeding you will tolerate and how much produce you can actually use.
Start at 100 square feet or less, get the map right on paper, and let next year’s expansion be a choice instead of a rescue.
Select Plants
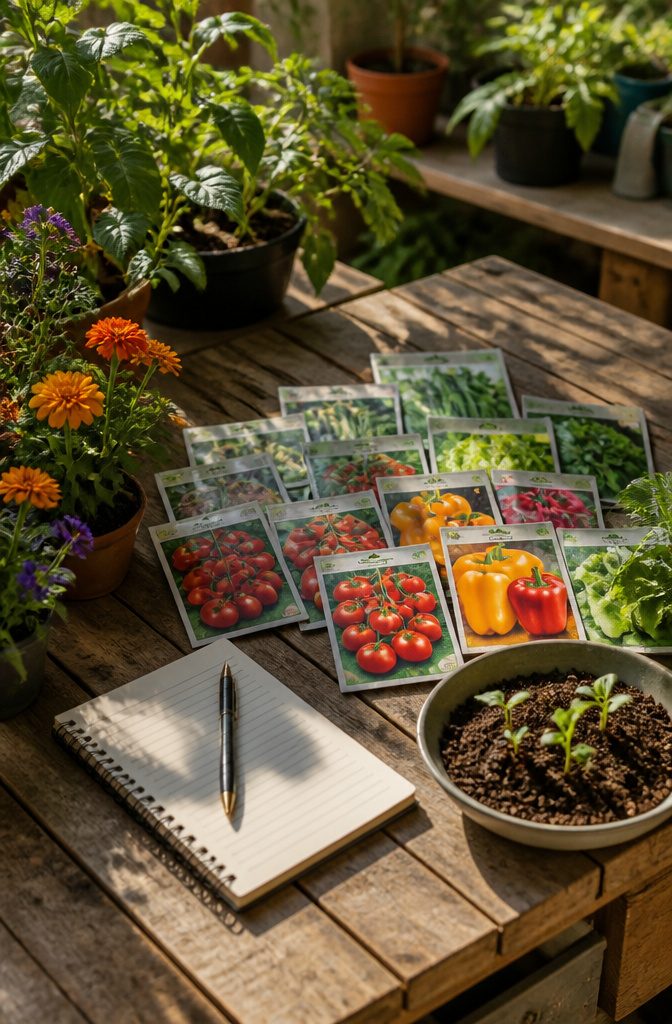
Tomatoes, peppers, and leafy greens form the backbone of most beginner gardens for good reason. They forgive inconsistent watering, produce within a single season, and reward you with food you actually recognize from the grocery store.
Green beans, potatoes, zucchini, leaf lettuce, kale, radish, basil, and cilantro round out the list of easy-to-grow vegetables worth considering for a first plot.
What you eat matters more than what photographs well.
I start my list with dinner, not a seed catalog. If no one in your household eats kale, three months of tending it becomes a chore instead of a pleasure.
The same space given to basil you will tear weekly for pasta sauce pays back in motivation, not just harvest weight.
Warm-season vegetables like tomatoes and peppers need frost-free nights to thrive; plant them too early and a single cold snap can undo weeks of growth.
Cool-season options such as leaf lettuce and radishes let you start sooner and harvest while you wait for the soil to warm.
Your USDA hardiness zone narrows the field further, and personal preference finishes the job.
A catalog full of heirloom tomatoes means nothing if you only eat cherry varieties in salads. Pick three to five plants you will genuinely use, and your first layout already has better odds than most.
Plan for Spacing
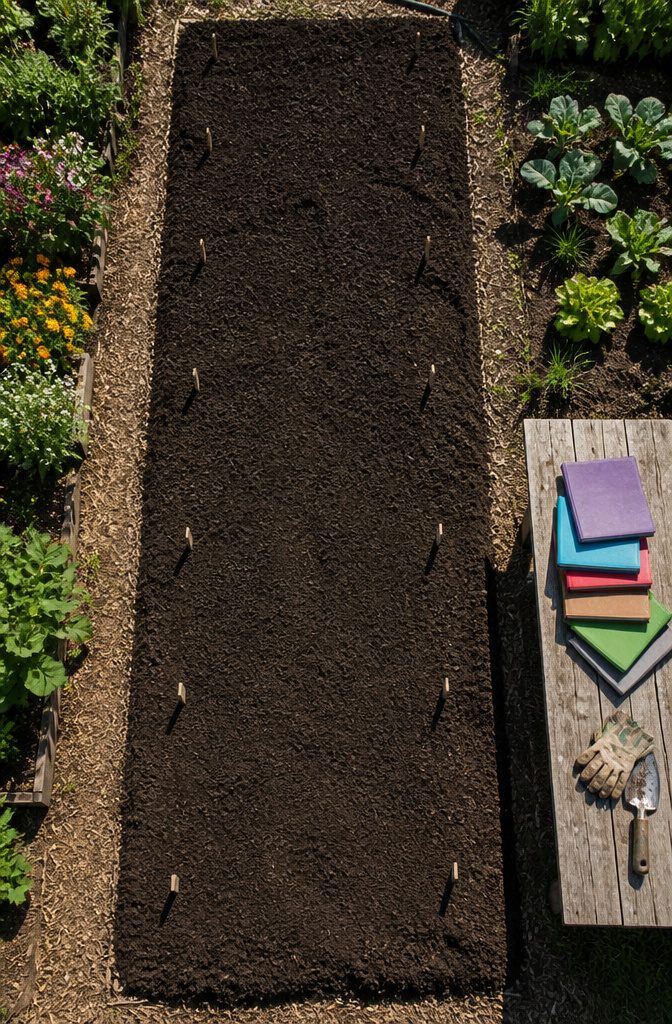
Seed packet spacing is the rule I follow, and when the packet gives a range, I use the smaller number.
You can always thin seedlings later if they crowd each other. A packet that calls for 3-inch spacing means sixteen plants in one square foot: four rows of four.
That density works because most vegetables tolerate less room than commercial recommendations suggest, and pulling the early growers first opens space for the rest to mature.
Companion planting deserves a brief mention, though I keep to pairings I have actually tested myself.
Basil near tomatoes and marigolds near most vegetables are the two I rely on; they grow well together and cause no trouble with spacing math. Stick to spacing you can maintain; untested companion pairings are not worth the risk.
If you want to experiment beyond that, treat it as a separate project with its own spacing plan rather than squeezing untested combinations into your beginner layout.
Prepare the Soil

Soil work is where a beginner garden layout lives or dies, and the fastest way to know what you’re dealing with is the squeeze test.
Grab a handful of damp soil and clench it. If it holds together like modeling clay, you’ve got drainage trouble that compost will fix over time.
If it crumbles apart, you’re in decent shape. I run this test every spring before I plant, and again in fall after the last harvest because that’s when I work in a layer of compost either way.
Heavy clay or poorly drained ground can rot roots before your plants ever get established, so amending with compost each fall after harvest and/or in spring is the rhythm that keeps soil healthy continuously.
Bulk compost from a local center runs cheaper than bagged if you’re covering more than a couple beds, and either beats skipping the step.
Raised beds skip this entire evaluation. You fill them with the mix you want from day one, no squeeze test required, no years of building tilth.
That convenience costs more upfront in lumber and soil, which is why I still keep one in-ground plot for root vegetables and use raised beds only where the native soil is truly hopeless.
Plant and Maintain

A watering schedule is the habit that makes or breaks a first-year garden.
I set phone reminders for the first month, usually mid-morning and again at dusk during heat waves, until checking soil moisture feels as automatic as locking the front door.
The soil 2 inches down should feel like a wrung-out sponge, not wet cardboard. Dry crust on top means I already waited too long.
Weeding is simpler if I walk the rows with a hoe every third morning.
Ten minutes then beats an hour on Saturday, and the roots come out clean before they set seed. I skip the kneeling pad and just keep moving.
For pest monitoring, I look at leaf undersides while the coffee brews. Holes, sticky residue, or sudden wilting get a photo and a trip to the county extension site.
I am not an entomologist, so I do not pretend to ID every beetle. I know enough to catch problems early, before a few aphids become a colony that forces hard choices.
Square Foot Gardening
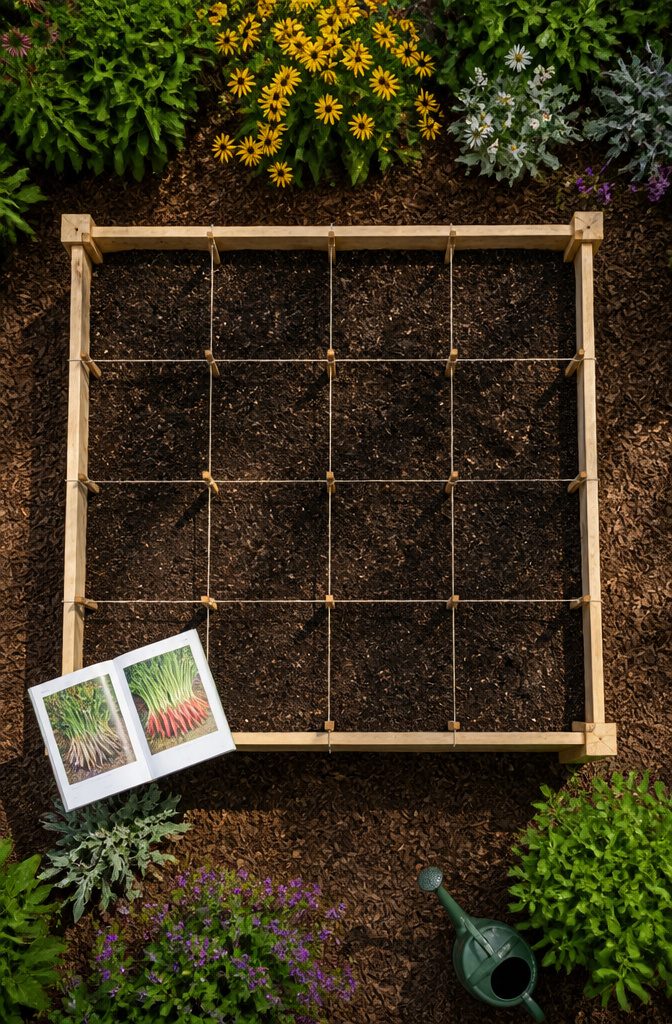
A 4×4 or 4×8 bed breaks into perfect 1×1 foot squares with nothing more than string and stakes, or thin strips of wood laid across the soil.
Each square holds one crop, and the math stops at counting: 16 carrots, 9 bush beans, or 4 lettuces, based on the spacing on the seed packet.
I would use the smaller number listed there and thin later if needed, rather than second-guess myself in the dirt.
The grid gives beginners three things that matter more than they sound. Boundaries are visible from across the yard, so you remember what you planted where without labels that fade or shift.
One square can be replanted, covered with netting, or treated for pests without disturbing its neighbors. The whole bed stays manageable because you are working in twelve-inch chunks, not staring down a blank rectangle that feels too big by July.
A 4×8 bed fits this method exactly, giving you 32 squares in a footprint that most renters or first-time owners can find against a fence or garage wall.
That is enough variety to keep dinner interesting without the maintenance load of a 10×10 plot, which can overwhelm a new gardener fast.
I would start there and add a second bed next year once I knew how much time watering and weeding actually took.
Block Planting

Block planting groups vegetables into solid rectangles instead of stretching them in single-file lines. I grew up watching my family plant in rows, and that method still makes sense when you have acres and a tractor.
In a home plot, those aisles eat space you do not have. A 10×10 foot layout fills fast when every foot between rows sits empty.
Solid blocks warm faster in spring because the leaf canopy closes sooner and traps heat at soil level.
That same canopy shades out weeds that need light to germinate, so you spend less of your weekend pulling seedlings and more of it harvesting.
Keep each block to about 3 or 4 feet long so you can reach the center without stepping into the bed and compacting soil.
Some crops still want a single row, tomatoes and pole beans among them. For everything else, blocks fit more plants into the same footprint and leave less bare ground to maintain.
If you are working a small rented yard or your first patch of owned dirt, that efficiency matters more than the tidy geometry I was raised on.
Raised Bed Gardening

Raised beds put soil control and drainage in your hands rather than your yard’s. I would start there for any beginner garden layout, because compacted ground and poor drainage kill more first-year gardens than bad seed ever will.
Keep the width to 3 or 4 feet.
Anything wider and you will step into the bed to reach the center, which ruins the loose, workable soil you built it for. Two-foot paths between beds are enough to wheel a barrow or kneel with a basket.
For materials, cedar rots slowest and smells good while it does. Pine costs the least but plan on replacing it in three to five years once the damp soil wins.
Composite lumber lasts longest, though at roughly triple the cedar price I would only go that route if I planned to stay in the house long enough to amortize it.
For a renter or a first layout you are testing, cedar works well: pay once, harvest from it for a decade, and carry the boards to your next place if you move.
Container Gardening

Container gardening is where most of my actual growing happens, because a pot on a balcony or patio lets you test what works before you dig anything into the ground.
The layout here is the arrangement of pots themselves, not rows, and mobility is the feature I use most: shifting a tomato to catch three more hours of sun, or hauling a salad pot against the house when the wind picks up.
Minimum sizes matter. A tomato needs at least a 5-gallon pot; anything smaller and the roots hit the walls before the fruit sets.
Leafy greens get by in 12-inch diameter containers. Use potting soil, not garden dirt or topsoil; the drainage structure is completely different, and standard soil turns to concrete in a confined space.
Dwarf or compact vegetable varieties give the cleanest results in this setup, since a full-size zucchini will overhang its pot and block its neighbors by July.
I treat my container layout as modular: heavy terracotta stays where I put it, but resin or fabric pots move on a whim. The flexibility costs nothing extra and saves plants more often than any fertilizer does.
Four Square Layout
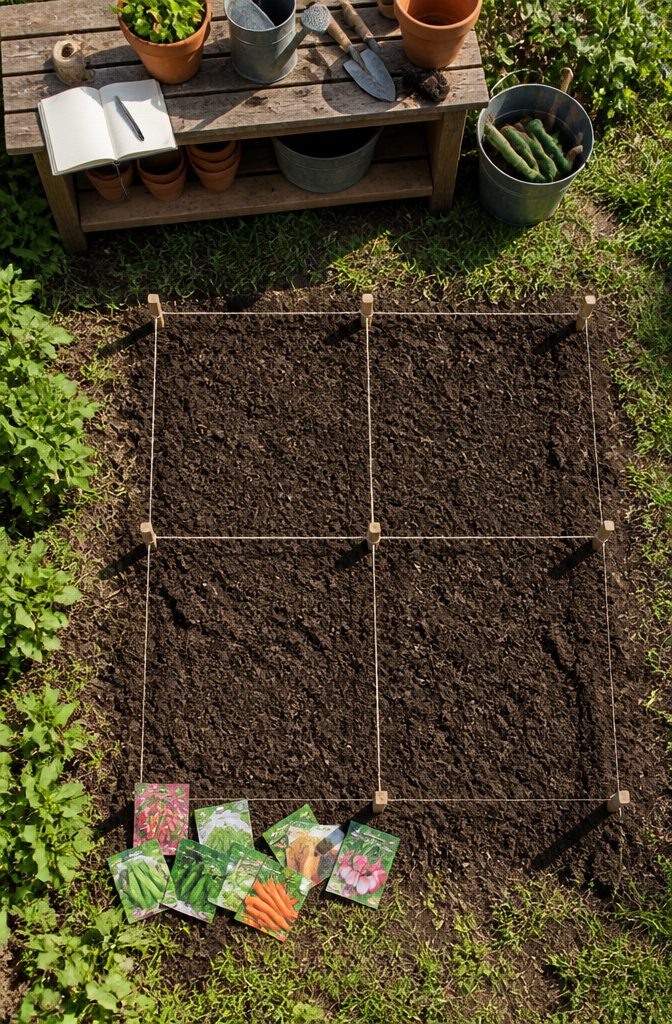
The four square layout divides the garden into four equal beds for crop rotation, the only beginner layout that plans past the first season.
Each year you move plant families clockwise through the squares, never repeating the same family in the same spot for 3 to 4 years.
This breaks disease cycles and balances soil nutrients, since vegetables in the same botanical family share nutrient needs and attract the same pests.
I skipped this my first two seasons, and I would skip it again for anyone in their first year.
The layout demands you already know four plant families and can plan a full rotation before you have planted your first tomato.
Most beginners are not struggling with multi-year soil management. They are struggling with whether their seedlings get enough sun and when to water.
The four square layout is worth adding once the garden is established and the basic habits are automatic, not while you are still learning what a healthy squash vine looks like.
Sunlight and Water Access

Most vegetables and cut flowers need 6 to 8 hours of direct sun, and the difference between 6 and 8 matters more than beginners realize.
A spot that looks bright at 10 a.m. can sit in shadow by afternoon once the house or a tree shifts the light.
I spend one full day checking the site every two hours, marking the edge of sun with a stick or a rock each time.
By evening I have an honest map of what the space actually delivers, not what I assumed over coffee.
Water access shapes the layout just as much. A hose that stretches to every bed without dragging across planted rows means I water more often and more evenly.
When I have to coil and uncoil, or carry a sloshing can past seedlings, the task shrinks to every-other-day at best.
The garden should sit close enough to a spigot that a soaker hose or a sprinkler runs without extension cords snaking through the yard.
That proximity also matters for raised beds or containers, which dry out faster than ground soil and need more frequent attention during hot spells.
Starting Size and Scaling Up

A 100 square foot plot, or roughly 10 by 10 feet, is the starting point I would pick for any first garden. That footprint fits enough variety to stay interesting without demanding more weekend hours than most beginners actually have.
4 by 8 feet works too, and it does, but the square shape is easier to reach into from every side without stepping on soil.
In my second year I doubled my space and watched half of it go weedy by July.
The mistake was enlarging the existing beds rather than adding a separate one. When you stretch a bed, you do not just add work; you change the rhythm of what you already know.
Watering takes longer, weeding spreads thinner, and the garden starts to feel like a chore before you have built the habit.
The better move is adding one new bed of the same size the next season, keeping the original plot intact. That keeps the maintenance pattern familiar while the total harvest grows.
A 3 foot width with 3 foot aisles between beds, which I have come to prefer, lets you reach the center without compressing soil and gives you room to kneel or haul a wheelbarrow.
Start with a single bed at that width, add a second in year two if the first still looks tended by August, and stop there until the weeds are under control and the watering is automatic.
Soil and Compost Timing
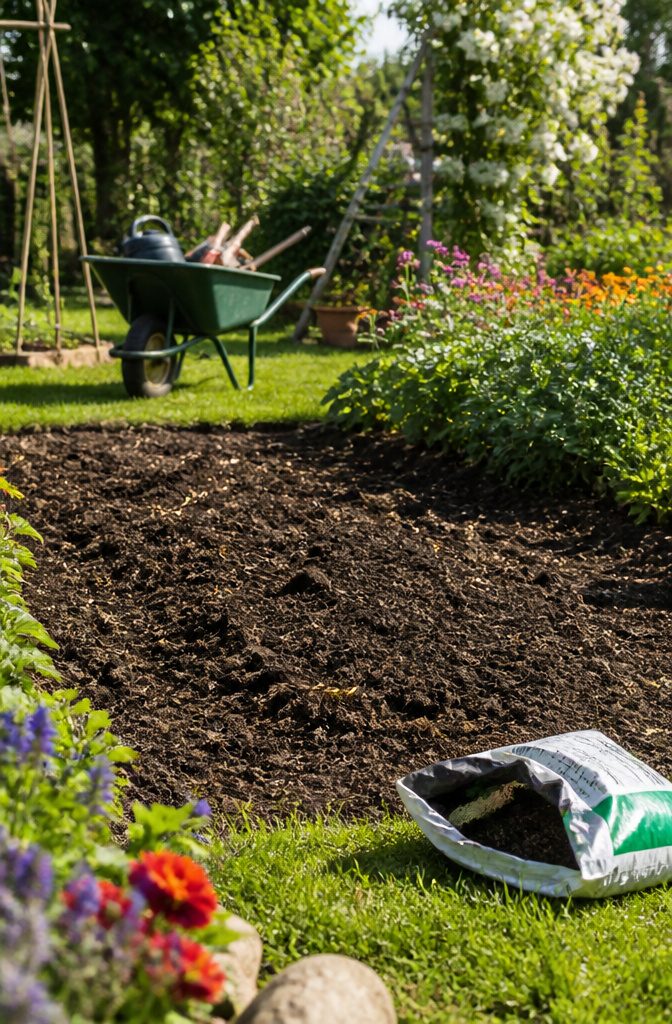
Two inches of compost spread across the bed each fall and again each spring, worked into the top six inches of soil, keeps most beginner garden layouts fed without overcomplicating the schedule.
That rhythm matches what the plants actually draw down through a season, and it gives the soil structure time to settle between doses.
Before committing to that work, test drainage by digging a hole six inches deep and filling it with water. If it sits for hours, the roots will drown in a flat bed no matter how good the compost is.
Raised beds fix this by letting water move through from the bottom, and they warm faster in spring, which buys a week or two on the front end of planting season.
Keep them three to four feet wide so you can reach the center without stepping in and compacting what you just loosened.
Containers skip the drainage guesswork entirely, but the shortcut only works if you start with fresh potting mix every spring.
Garden soil or topsoil in a pot turns into a brick by midsummer. The plants cannot break through it, and neither can water.
Layout Comparison
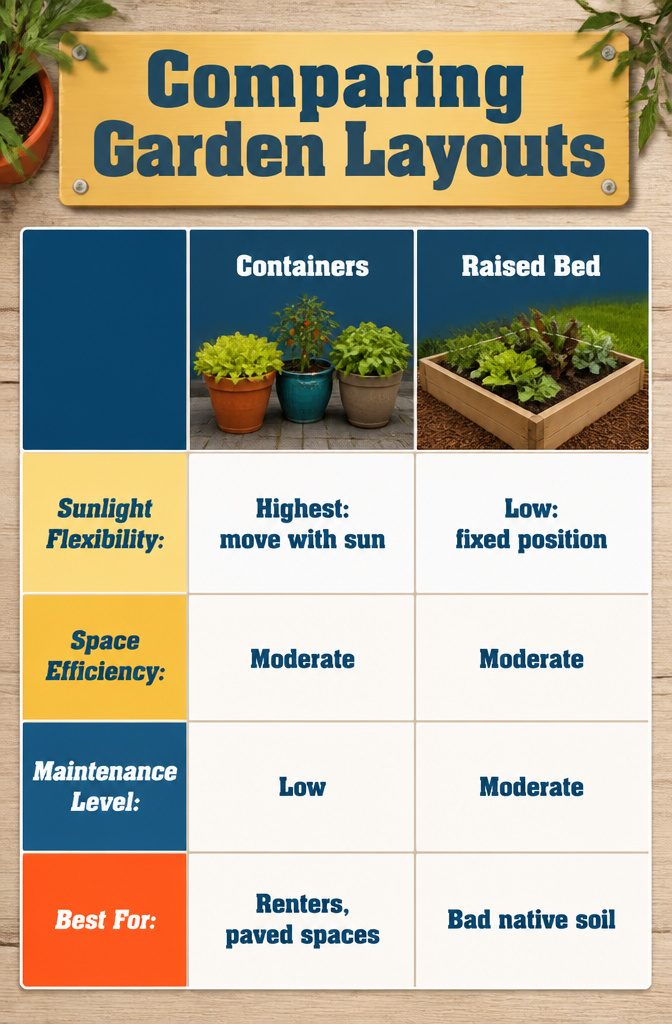
A layout is only as good as the problem it solves. Containers win on sunlight flexibility because you chase the light, not the other way around, which matters when your only growing surface is a balcony or a paved driveway.
Raised beds fix bad native soil without the years of amendment that in-ground rows demand, though they cost more upfront in lumber and fill dirt.
Square foot gardening, or block planting, packs the most production into the smallest footprint by eliminating aisle space and shading out weeds faster than row layouts do.
| Layout | Sunlight Flexibility | Space Efficiency | Maintenance Level | Best For |
|---|---|---|---|---|
| Containers | Highest: move with sun | Moderate | Low | Renters, paved spaces |
| Raised Bed | Low: fixed position | Moderate | Moderate | Bad native soil |
| Square Foot/Block | Low: fixed position | Highest: no aisle waste | Lower: fewer weeds | Small spaces, busy beginners |
| Rows | Low: fixed position | Lower: aisle space required | Higher: more weeding | Large yards |
| Four Square | Low: fixed position | Moderate | Moderate | Large yards |
I would start with containers if I were renting and unsure about next year, or square foot if I had a small permanent patch and felt overwhelmed by the idea of managing a full garden plan.
Raised beds earn their cost when your existing soil is compacted clay or contaminated; otherwise, that money often buys more plants than structure.
What I Skip and Add Later

Companion planting and crop rotation are worth understanding, but I would not build a first-year layout around either one. The pairings that actually matter early on are the obvious ones: basil beside tomato, maybe lettuce tucked into shade.
Everything else, like interplanting okra as living stakes for tomatoes or adding mustard to manage Fusarium, is a year-two refinement once you have observed how your specific soil behaves.
Crop rotation follows the same timeline. The botanical-family rule, avoiding the same family in one spot for 3 to 4 years, becomes relevant around year three when disease pressure and nutrient depletion start showing up as real problems rather than theoretical risks.
In a small beginner plot, rotating what you can is smart, but rigid family-based rotation is often impractical until you have multiple beds or more space than a first garden usually offers.
What I would add instead is simple labels. Skipping them is a common mistake that costs nothing to fix and saves constant confusion when seedlings look identical in May.
A labeled plot also lets you track what sat where, which makes any future rotation you do attempt actually possible to plan.
Frequently Asked Questions
What is the best vegetable garden layout for beginners?
Square foot gardening is the best starting point for most beginners.
A 4×8 bed divided into 1×1 foot squares keeps the work manageable, makes it easy to track what you planted where, and gives you 32 planting slots in a space that fits against most fences or garage walls.
The grid turns an overwhelming blank rectangle into small, workable chunks.
How do I determine the spacing for my vegetables?
Check the seed packet and use the smaller number if a range is given.
For square foot gardening, divide 12 inches by the spacing on the packet to find how many plants fit per square: 3-inch spacing means 4 by 4, or 16 plants per square. You can always thin seedlings later if they crowd each other.
Can I mix different vegetables in the same garden layout?
Yes, as long as they share similar sun and water needs.
Stick to tested pairings like basil near tomatoes or marigolds near most vegetables, and give each plant the spacing its seed packet calls for. Untested companion combinations should stay in their own experimental space rather than complicating your first layout.
What are the 9 golden rules for designing a garden?
It offers practical priorities instead: watch your site for a full day before planting, start at 100 square feet or less, pick 3 to 5 plants you actually eat, and water when the soil 2 inches down feels like a wrung-out sponge.