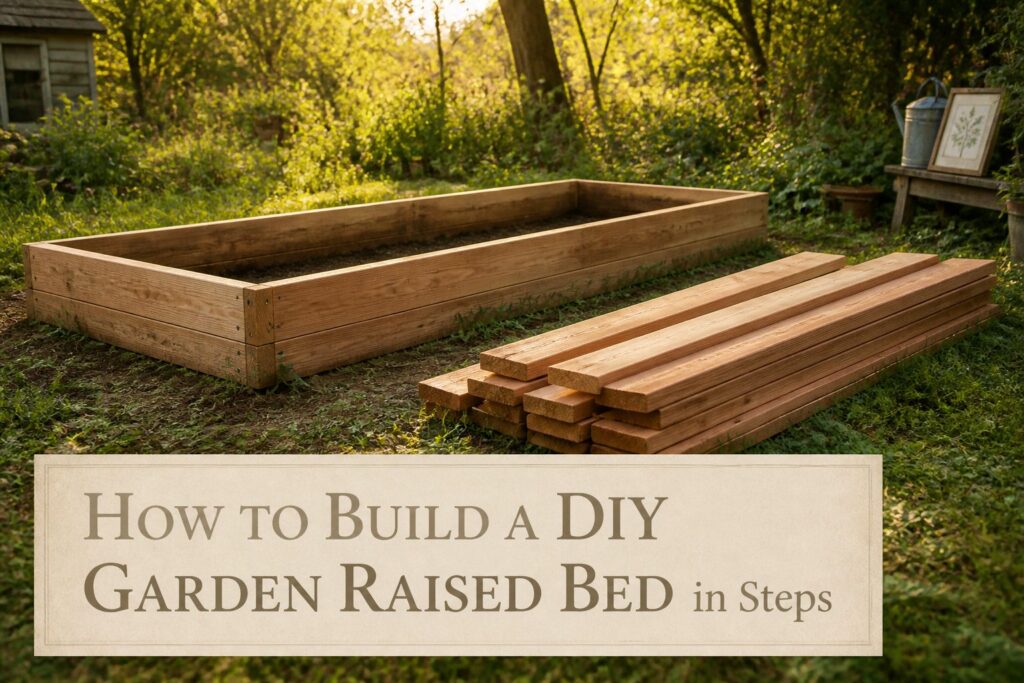
A finished 4 x 8 foot raised bed costs roughly a Saturday and the price of nine cedar boards, though pine cuts that bill by half if you accept a rebuild in three to five years.
The stage where most builds go wrong is not the cutting or the screwing; it is forgetting the 4-foot width ceiling that lets you reach the center without stepping on the soil you just paid to loosen.
Four feet is the hard limit because that is how far an average arm reaches from either side, and the moment you go wider, you are compacting the bed you built to avoid exactly that.
1. Plan the Size and Location

A 4-foot width is the hard ceiling for any raised bed I would build, because that is the distance an average arm reaches from either side.
Go wider and you are stepping on soil to weed the center, compacting the one thing you just spent money to loosen.
Depth is where I would not cut corners.
The minimum I would build is 12 inches, which covers carrots and the root development most vegetables need. I think 8 inches is playing it too close, even if some plans call for it.
The dimension that keeps showing up in plans that actually get finished is 4 x 8 feet. It uses standard lumber without waste, and one person can still wrestle the frame into place.
For location, I would pick the sunniest flat spot I have. Eight hours of direct light is the target for vegetables, and level ground keeps the soil depth even so one end does not dry out while the other pools.
A slight slope can be shimmed, but a hillside bed is a different project entirely. This choice locks in every cut that follows.
2. Gather Materials and Tools

Untreated cedar boards are what I would pick for a diy garden raised bed that needs to last.
The rot resistance is real, and the extra cost pays out over five or six seasons against replacing pine. Pine boards work if the budget is tight, but plan on a shorter life and probably a rebuild inside three years.
Either way, the wood must be untreated to keep chemicals from leaching into soil you’ll eat from.
For a standard 4×8 foot bed, you’ll want:
- (9) 2×4×8 untreated cedar boards, or the pine equivalent
- (1) 4×4×8 untreated cedar or pine board for corner posts, cut to 11¼ inches
- 2½ inch screws; at least 2 inches is the minimum that will hold
- Optional: weed barrier cloth, cardboard, or newspaper for the bottom
Tools that matter:
- Circular saw or wood saw for your cuts
- Drill with a 5/32 inch bit for pre-drilling
- Screwdriver or impact driver
- Level, so the bed doesn’t drain to one corner
Bar clamps help if you have them, but a second pair of hands works about as well.
3. Cut the Boards

The exact lengths depend on what bed size you settled on, but a standard 4×8-foot box gives you the simplest math: two 8-foot boards for the long sides, two 4-foot boards for the ends.
I would work with 2×12 fir for the box itself, though cedar holds up longer if the budget stretches.
Either way, keep every cut square. A frame that rocks on uneven cuts will gap at the corners and stress whatever fasteners you use later.
A speed square against the blade before each cut saves the whole afternoon.
I check the miter saw fence with a carpenter’s square every few boards; the small ones drift, and a degree off at the saw becomes an eighth-inch gap by the time you screw the frame together.
The bed will sit flat on soil eventually, but a twisted rectangle is harder to level and harder to line with weed cloth if you choose that route.
Cut the corner posts to match your board height, or 11-1/4 inches if you are stacking three 2x4s instead.
4. Assemble the Frame

Screw the boards into a rectangle, but pre-drill every hole first so the wood does not split.
A 5/32-inch bit gives enough clearance for the screw without tearing the grain. I run the long sides outside the short ends; the corner looks cleaner and the end grain is tucked out of sight.
Before driving the last screw, check the frame for square by measuring corner to corner across the diagonals.
When those two numbers match, the corners are true right angles. A clamp holds everything steady while you work, and a couple of finish nails tacked in temporarily do the same job if you are working alone.
If the boards have knots, steer the screws clear of them.
Knots will split or strip before the screw bites solid wood. Galvanized fasteners set back from the end grain hold better than three screws driven straight into the edge, which is exactly where the board wants to crack.
This is the step where the bed stops being a pile of lumber and starts looking like something that belongs in a garden.
5. Add Corner Supports

Corner posts are what separate a bed that lasts three seasons from one that starts racking after the first.
Sink a 4×4 at each corner, extending below the frame so it anchors into the ground the way Mother Earth News describes: dig 5 to 6 inches down for each post, then set the box on top.
I would not skip this even on a weekend build. The post sits inside the corner, boards butting against it from either side, which is cleaner than boards meeting at a miter and hoping the joint holds.
For anything over 4 feet on a side, I would add a mid-span stake or a length of ledger board screwed across the middle.
Bob Vila learned this the hard way: his pine bed bowed under soil pressure until he drove rebar in after the fact.
Installing that cross-support during assembly takes five extra minutes and saves the geometry of your rectangle. Redwood holds up well for the posts, though pressure-treated 4x4s work if that is what the yard stocks.
Chris Loves Julia built theirs with the posts extending up to accept a mitered cap frame, which is optional but tidy if you want a place to set a trowel.
I would keep the height modest unless you need the ledge; the post only needs to run long enough below to bite into soil and keep the box square.
6. Prepare the Site

A flat site matters more than a perfect one.
I look for the high corner and scrape or shovel soil from it until the whole footprint reads roughly even; a few inches of slope is fine, but water pooling against one wall will rot wood faster on that side.
Grass and roots come out next, or at least get cut as short as a shovel allows.
Whether to till the top few inches depends on what you’re growing: tap-rooted vegetables benefit from the extra depth, but plenty of gardeners skip it and do fine.
I would till if the bed is shallow and leave it if I am building 16 inches or taller, since the soil volume inside the frame is what the roots will actually use.
For the bottom layer, cardboard is free and breaks down within a season or two, which suits a temporary bed or a rental where you might not stay long.
Newspaper works the same way. Landscape fabric lasts longer but can tangle roots that grow deep enough to hit it; pulling a bed apart years later and finding a mat of trapped fiber is not a job I enjoy.
Given the choice, I lay down flattened boxes and call it done.
7. Fill with Soil Mix

Native soil belongs on the bottom of a deep bed, not in a bag from the garden center.
Scraping a few inches from the ground beneath the frame saves money and gives roots the run they need. Earthworms find their way up through open bottoms, and over time that soil structure beats anything shipped in a plastic sack.
The top half is where the ratio matters. I would aim for roughly 70 percent raised bed mix to 30 percent compost and skip the premium blends with flashy labels.
The compost provides the biology; the mix provides the structure. Brand names change by region, but the proportion does the real work.
Fill to within an inch of the rim. Soil settles after the first few rains, and starting flush leaves you with a sunken trench by June.
Most first-timers either blow the budget hauling in bags to fill the entire depth or cheap out on compost and wonder why tomatoes stall by July.
The middle path wins: native soil below, quality mix above, and stop short of the top.
8. Plant and Space

Shallow-rooted greens like lettuce and spinach need less than 12 inches of soil, while tomatoes and carrots want the full depth a 12-inch bed provides.
Six inches works for a lot of crops, but the taller box gives you flexibility if you change your mind next season. I would size for what I plan to grow most, then leave a little extra.
Raised beds warm faster in spring than ground soil, which extends your planting window slightly.
That matters more in short-season regions where every week counts. Bush watermelons spread 3 to 4 feet, and tomatoes can shoot past 7 feet, so spacing between beds matters as much as depth.
I would rather add a second small bed than crowd a single large one; competing plants shade each other and fight for nutrients.
A 4-foot width lets you reach the center without stepping in, which keeps soil from compacting.
Length is whatever fits your space. Tall beds also save your back over a season of bending, and that comfort difference adds up fast.
Cedar, Pine, or Cinder Block

The material you choose for a diy garden raised bed shapes how long it lasts and how much effort you’ll spend rebuilding it. Cedar runs more expensive up front but lasts 10–15 years untreated thanks to natural rot and insect resistance.
Pine costs less initially, though you’ll replace it in 3–5 years. Cinder block at roughly $1 per unit is permanent and budget-friendly, yet hauling and stacking the weight is a project in itself.
Corrugated metal gives a modern look but still needs a wood frame for structure, so you don’t escape lumber entirely.
Straw bales work for one season and then decompose, which is either a feature or a hassle depending on your plans.
| Material | Lifespan | Upfront Cost | Weight | Notes |
|---|---|---|---|---|
| Cedar | 10–15 years | Higher | Light | Untreated only for edibles |
| Pine | 3–5 years | Lower | Light | Budget starter option |
| Cinder block | Permanent | ~$1/block | Heavy | No decay, labor-intensive |
| Corrugated metal | 15+ years | Moderate | Medium | Requires wood frame |
| Straw bale | 1 season | Lowest | Light | Composts in place |
For a first bed on a real budget, I’d pick pine.
The shorter lifespan is the trade-off, but three to five growing seasons gives you time to learn what you actually want before investing in cedar or replacing with something permanent.
If you’re certain this is a long-term space, cinder block is the smarter spend, but only if you’re ready for the lifting.
What Depth for Which Plants

Lettuce and herbs need 6 inches of soil to root comfortably. That is shallow enough to keep lumber costs down and filling the bed fast.
Peppers and bush beans want 12 inches, the same depth Bob Vila settled on for his own bed after finding carrots demanded at least that much. Tomatoes, carrots, and parsnips run deeper; 18 to 24 inches lets them stretch without hitting bottom.
A bed built for everything should sit at 18 inches. That covers most vegetables in one frame, though you will pay more to fill it.
If salad greens are the main goal, a shallower box saves both wood and soil. Bonnie Plants notes that 8 to 12 inches is the minimum for strong roots, and most people prefer the taller end for the back relief alone.
You can build one deep bed that handles almost anything, or save money and effort with several shallow beds for smaller plants.
Why Raised Beds Work

Raised beds earn their keep through mechanics that are easy to overlook until you’ve spent a season fighting your ground.
Soil in a frame warms faster in spring than the earth beneath it, giving you a two- to three-week head start on planting in most climates.
Drainage follows the same logic: water moves through loose fill rather than pooling in compacted clay or draining too fast through sand.
You are not amending native soil for years; you are filling the box with what your plants actually need from day one.
Weed pressure drops sharply because you start with clean material and the defined edge makes the few that do appear simple to spot.
The 11- to 12-inch height common for DIY builds also cuts the bending that makes in-ground gardening a back exercise. These are not yield miracles or pest eliminations, just labor saved where it counts.
With raised beds, you can create the perfect conditions for whatever you choose to grow at home.
That line from Mother Earth News captures the core advantage: your carrots do not hit rocks you did not know were there, and your tomatoes do not sit in drainage you cannot fix.
The frame sets the rules, not the lot you happened to rent or buy.
Frequently Asked Questions
What is the best material for raised garden beds?
Cedar lasts 10–15 years untreated thanks to natural rot and insect resistance, making it the best long-term pick for diy garden raised beds.
Pine works for a tighter budget but plan on replacing it in 3–5 years. Cinder block is permanent at roughly $1 per block, though hauling and stacking the weight is a project in itself.
How deep should a raised garden bed be?
Build at least 12 inches deep to cover carrots and the root development most vegetables need.
Lettuce and herbs manage with 6 inches, while tomatoes, carrots, and parsnips stretch better in 18 to 24 inches. An 8-inch bed plays it too close even if some plans call for it.
How do I fill my raised garden bed?
Scrape native soil into the bottom half of a deep bed, then fill the top half with roughly 70 percent raised bed mix and 30 percent compost.
Stop within an inch of the rim; soil settles after the first rains and starting flush leaves you with a sunken trench by June.
Can I use treated wood for raised garden beds?
No. The wood must be untreated to keep chemicals from leaching into soil you will eat from.
Untreated cedar or pine are the standard choices; pressure-treated 4x4s only work for corner posts if that is what the yard stocks, not for the box itself.
How do I prevent weeds in my raised garden bed?
Lay cardboard, newspaper, or weed barrier cloth across the bottom before filling.
Cardboard is free and breaks down within a season or two, which suits temporary beds. Landscape fabric lasts longer but can tangle roots that grow deep enough to hit it.
What kind of wood do you use for a raised garden bed?
Untreated cedar is the top choice for rot resistance and a 10–15 year lifespan.
Untreated pine costs less upfront and works as a starter option, though you will likely rebuild inside three years. Either way, untreated is the rule for anything touching edible garden soil.
What not to fill a raised garden bed with?
Do not fill the entire depth with bagged soil from the garden center; that blows the budget and wastes money where native soil or organic debris would do.
Skip premium blends with flashy labels in favor of a simple 70/30 mix of raised bed soil and compost. Also avoid skimping on compost, since tomatoes and other heavy feeders stall by July without enough biology in the mix.