
These 6 ideas run from a morning with a screwdriver to a full weekend with a miter saw, and the deciding factor is how much of your cabinet structure you are willing to alter.
Paint and hardware keep every door and drawer intact; crown molding and fluted fronts mean measuring, cutting, and committing to a new profile.
What separates a $50 refresh from one that climbs toward $200 is whether you stop at surfaces or start changing shapes.
1. Painting Cabinets

Painting cabinets is the single fastest way to change a kitchen’s whole mood.
Charcoal reads as almost black in some light, warm gray in others; that kind of depth comes from a satin or semi-gloss finish over a dark base, not from flat paint.
Check what you are starting with. Thermofoil or laminate cabinets need a bonding primer first; raw wood takes standard primer.
Either way, clean with degreaser, sand to scuff, and plan on 2 coats plus dry time. I would skip the upper-cabinet display ledge unless you genuinely have items worth showing; it adds dusting.
2. New Cabinet Knobs and Pulls
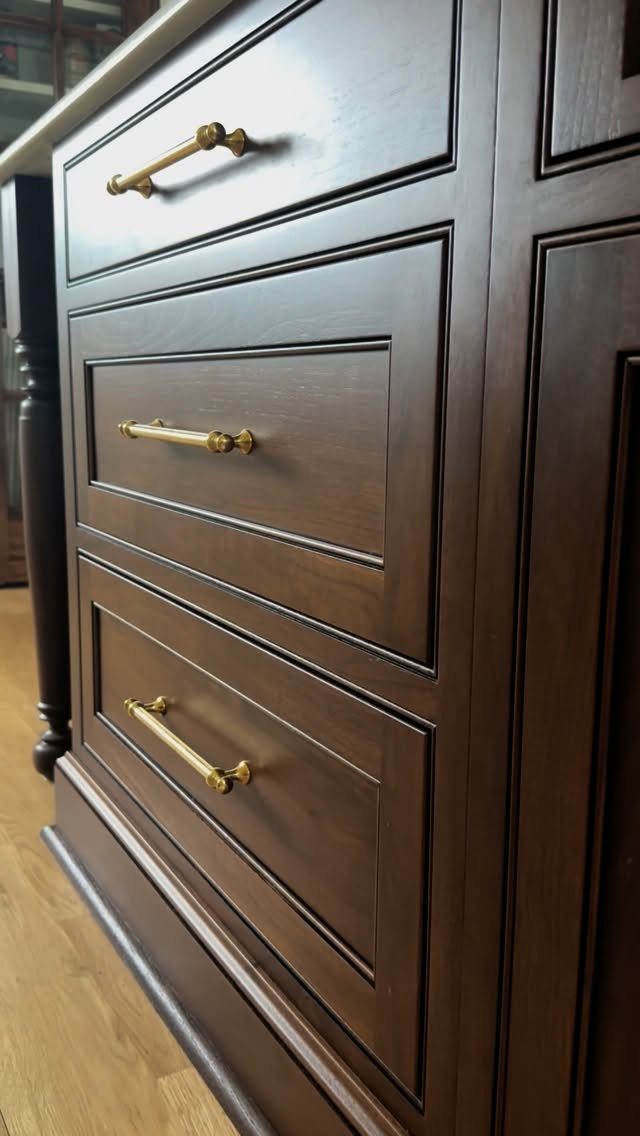
Horizontal bar pulls in brass warm up dark wood without fighting it. Pulls at the drawer center look balanced on wide drawers but can feel low on narrower doors; I prefer vertical pulls for doors, or knobs.
Measure your existing hole spacing before you shop. Most pulls come in standard centers, and filling old holes to re-drill is doable but annoying.
Solid hardware that lasts does not have to cost much; soft brass like this will patina, which I like, but if you want it bright you will polish occasionally.
One afternoon with a screwdriver, or a drill if the holes are new.
3. Adding Molding
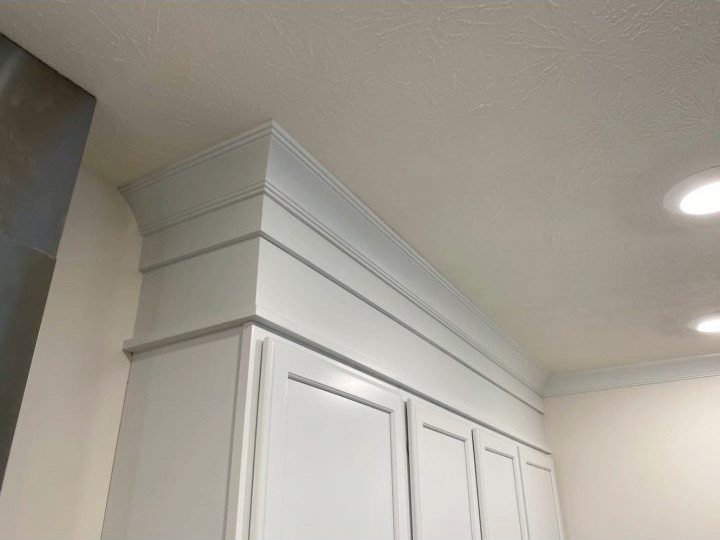
Stacked crown molding at the ceiling line turns stock cabinets into something that looks built in.
Three distinct trim pieces make this work: a base strip against the cabinet, a larger crown, and a small filler piece that closes the gap to the ceiling. That layering is what reads as expensive, not the individual profiles.
You will need a miter saw and a nail gun, plus wood filler and caulk for the seams. Paint the molding before installation; touching up nail holes is easier than cutting in against a ceiling.
I would do this only if my cabinets already reach close to the ceiling; a large gap needs more filler than looks good. Lumber for a small kitchen is not the expensive part of this job.
4. Creating Open Shelving
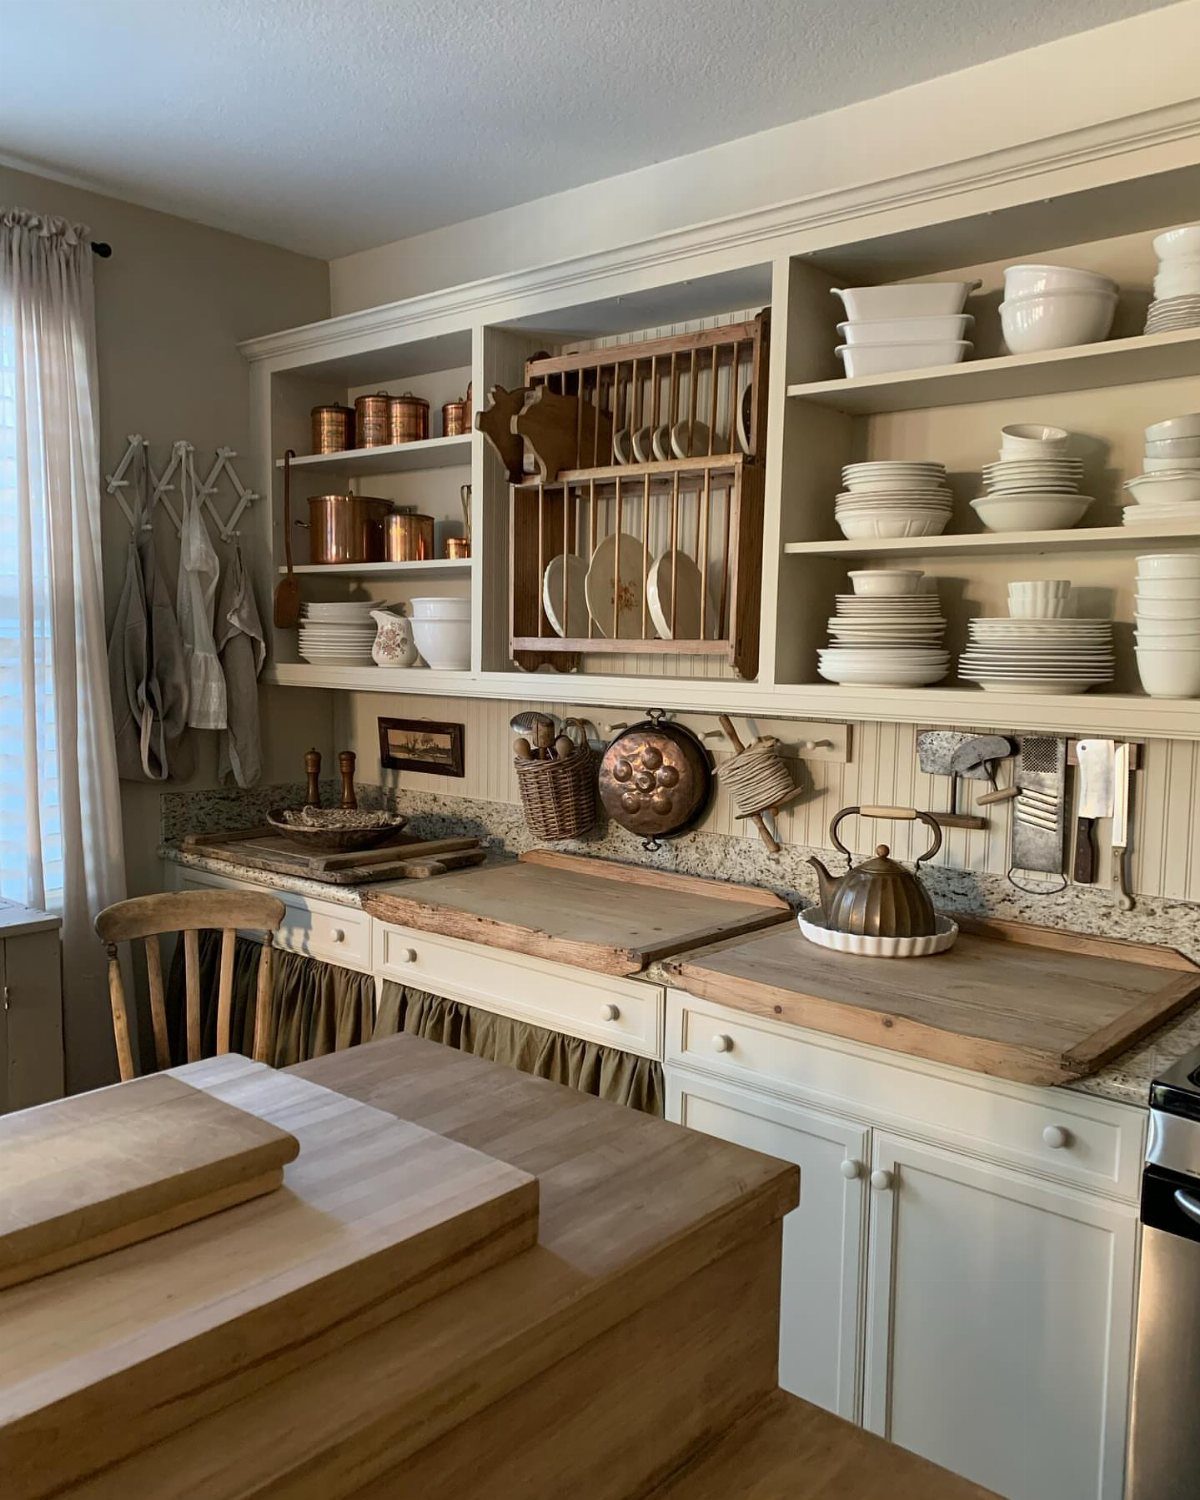
Removing upper cabinet doors and the center stile between pairs gives you open shelving without buying new. Cream cabinets that keep their face frames make for a simpler move; taking the frames too means rebuilding shelf supports.
What you display becomes the design. White dishes and copper read as intentional; mismatched plastic does not.
I would commit to editing what sits out, or this ages fast. The plate rack above the lower cabinets is a separate project; skip it unless you have the wall space and the dishes.
Cost is nearly nothing if you only remove doors, maybe a few sawbucks for shelf brackets if you add them. A morning’s work, but the curation lasts forever.
5. Adding Decorative Trim
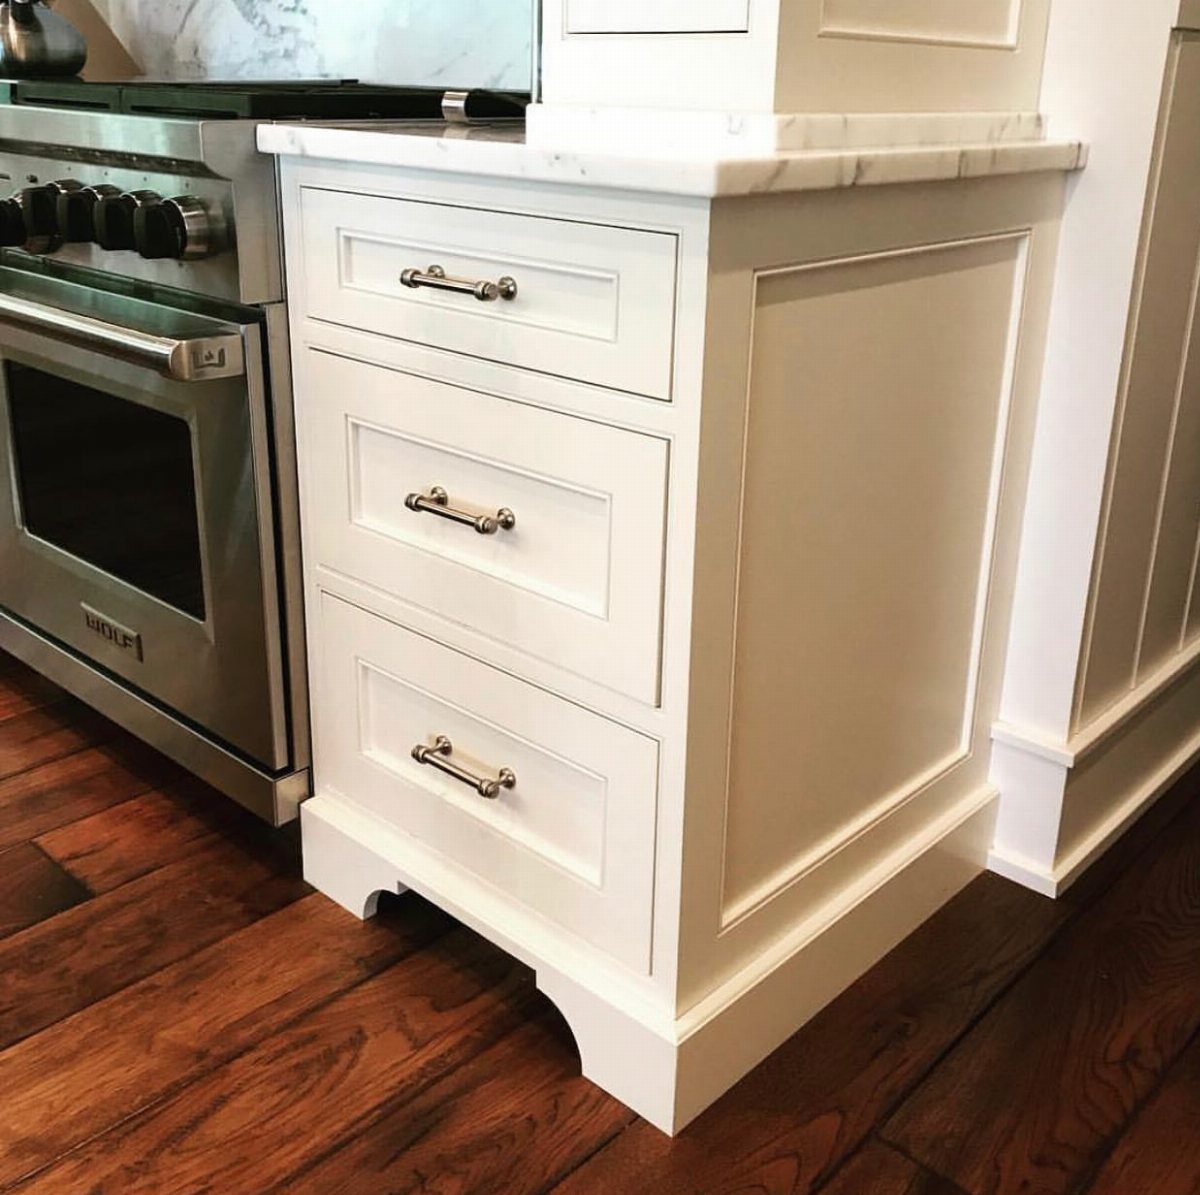
Decorative trim on the side panel and base of a cabinet adds shadow lines where flat panels read as blank. Applied molding, not routed detail, means you can add it to existing cabinets with glue and pin nails.
Choose a profile that matches your door style, or at least does not fight it.
The simple rectangle here suits shaker doors; raised panels need something more formal. Paint the trim the same color as the cabinet so it reads as thickness, not sticker.
I would do sides only where they show, typically the island end or a run’s terminal cabinet. A short length of molding and an hour with a miter box is all this takes.
6. Fluted Cabinet Drawer Fronts

Fluted drawer fronts add texture without pattern that competes with countertops or backsplash. The vertical grooves are evenly spaced and run the full drawer height; that regularity is what makes them read as deliberate rather than busy.
You can buy drawer fronts already fluted, or route your own if you have the tools and the original fronts are solid wood or thick MDF.
The beige here is warmer than white, which keeps the texture visible; in pure white I might go deeper grooves for shadow.
Brass hardware sits proud against the ridges, so choose pulls or knobs with short posts that do not tilt. New fronts cost more than paint or trim but less than new cabinets, and the price climbs with size and material.
Preparation Steps for Painting
Degreaser matters more than brand loyalty. Sprayway Glass Cleaner works, Clorox Wipes work, but the point is cutting through kitchen oils so paint grips.
I would label doors before they come off, not after; sticky tabs on the inside face, mapped to cabinet openings, save the puzzle of rehanging later.
Removal goes faster with help, but one careful worker with a drill and patience gets it done.
Cost Considerations
Refinishing runs $50–$200, which is the full budget for some of these projects.
Painting saves thousands against replacement, but that comparison only holds if you were honestly considering new cabinets. Hardware at $4–$8 per piece means a typical kitchen with 20 doors and drawers lands around $80–$160 for pulls or knobs.
Soft-close hinges add more. I would tally everything before starting, because these projects stack: paint plus hardware plus a few drawer fronts and the total climbs fast, still cheap against new but not the headline price you started with.
Time Commitment
A weekend is realistic for painting, hardware swaps, or removing doors for open shelving.
The schedule assumes dry time between coats, not continuous work; paint one day, hardware the next. Fluted fronts or full door replacement need longer, since they run through order and delivery.
I would not start crown molding Friday evening unless the miter saw is already dialed in and the lumber is acclimated to your house. The short projects earn their place by fitting real schedules.
Frequently Asked Questions
How do you make old cabinets look new?
Paint is the fastest change, especially charcoal or warm gray in satin or semi-gloss. Swapping pulls and adding crown molding where the cabinets meet the ceiling are 2 moves that read high-end without the cost of full replacement.
I would clean with degreaser and sand before any paint goes on, because kitchen oils are what make fresh paint fail.
How much does it typically cost to redo cabinets in a kitchen?
Refinishing runs $50–$200 for a small kitchen if you are doing the work yourself. Drawer pulls and door knobs run about $4–$8 each, so a kitchen with 20 openings lands around $80–$160 total for hardware.
The line items add up quick: paint, hardware, maybe a few replacement drawer fronts, and the total edges higher. Still a fraction of new cabinets, but not the opening number you planned on.
Can you paint cabinets DIY?
Yes, with proper prep. Degrease first, scuff-sand second, then match your primer to the surface: bonding primer for thermofoil or laminate, regular primer for raw wood.
2 coats plus dry time, and label doors before removal so rehanging does not become a puzzle. A weekend is realistic if the schedule accounts for dry time between coats.