

A DIY kitchen makeover can run from a hundred dollars in paint and hardware to a full cabinet and counter swap, and every option on this list lands somewhere in between.
What decides which idea is worth your weekend is how much of your kitchen you can afford to lose for a few days, and whether you need a temporary setup to get by.
The temporary kitchen setup, with a mini fridge and portable cooktop on one narrow table, is the detail that separates a project you can live through from one that sends you to takeout for a month.
1. Paint Cabinets

Painting cabinets is the single fastest way to reset a kitchen’s whole mood without touching the layout. Shaker fronts in a dark slate or navy read as custom without the price tag.
Before you start, check what you are working with. Laminate cabinets need a bonding primer; raw wood or previously painted wood still needs a coat to seal the grain and block bleed-through.
The finish looks sprayed, but a high-quality brush and patience get you close for a fraction of the setup.
I would skip the temptation to do both sides of every door at once; lay them flat, face up, and let them cure fully before flipping.
2. Replace Countertops

A new countertop changes how the whole room feels the moment you walk in.
Check your cabinet bases before you order.
Older cabinets may not carry the weight of thick quartz without reinforcement, and the cutouts for your sink and faucet need to be right the first time; most fabricators template on site, but you need to know your sink specs before they arrive.
I like the faux-marble look for rentals or first homes, real marble etches too easily for how I actually cook.
3. Install Two-tone Cabinets
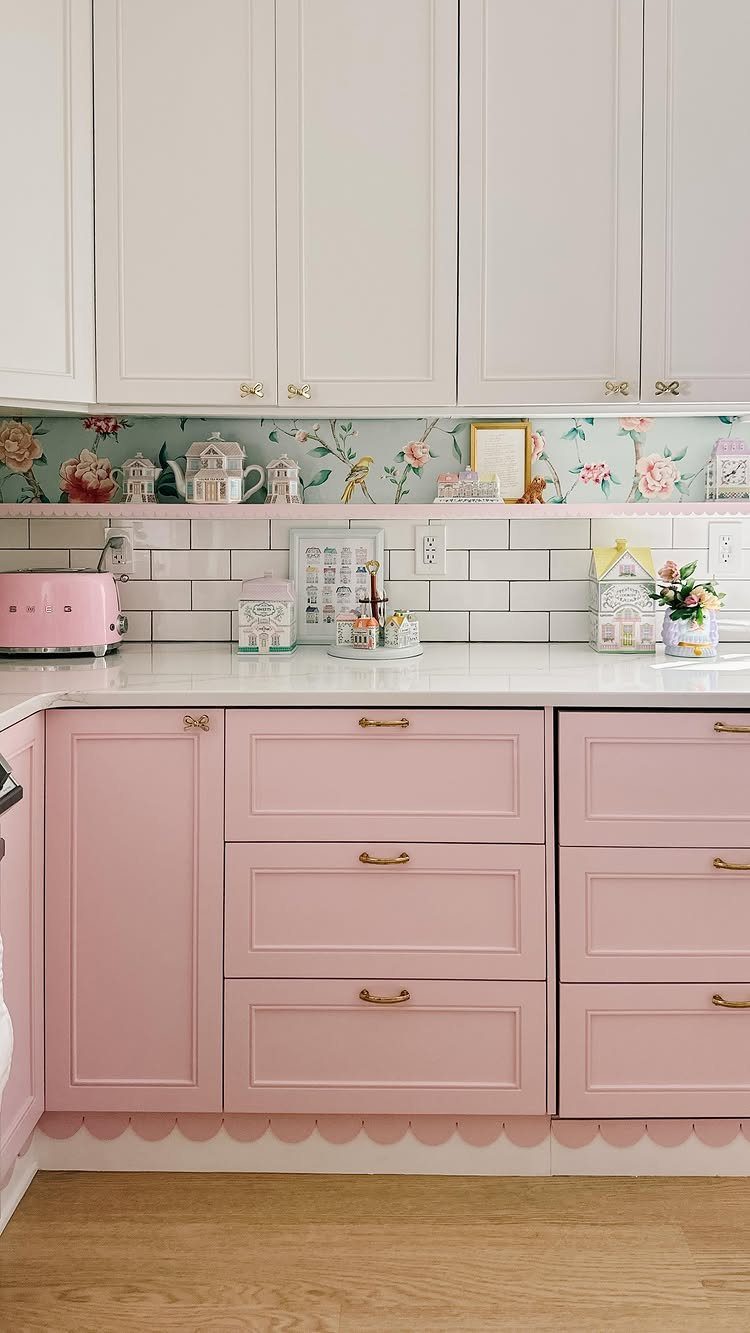
Two-tone cabinets break up a wall of sameness without requiring you to pick one perfect color. White up top and a soft pink below, separated by a white counter line, keeps it from feeling scattered.
Choosing which tone goes where decides whether the room feels intentional or busy.
Darker lowers ground the room and hide scuffs where hands actually land; lighter uppers keep the ceiling feeling high. Brass hardware bridges the two colors here, and I would not skip that step, mismatched metals across two tones looks accidental.
4. Create a Temporary Kitchen

A temporary kitchen keeps you eating at home instead of bleeding money on takeout while the real one is out of commission.
A mini fridge, portable cooktop, microwave on a wall shelf, air fryer and kettle fit onto one narrow table.
The real decision is where to put it. You need a water source within reasonable distance for filling pots and kettles, and a window or portable fan matters more than you think when you are pan-frying on a hot plate.
I would size the table to hold a cutting board alongside the cooktop, not just the appliances; prep space is what makes a kitchen actually usable.
The air fryer and microwave do most of the real cooking in a setup like this, so plan meals around them from the start.
5. Pendant Lights Over the Island

Pendant lights over an island turn a work surface into a room’s center of gravity. 4 pendants hung from a floating ceiling feature tell me the wiring was planned for that exact placement.
What you need to know before buying: the bottom of the pendant should sit above the counter at a height that clears your sight lines, and the width of each fixture scales with your island length.
I would hard-wire if I were already opening the ceiling for any reason, but a plug-in swag kit saves you the electrician if your box is not centered where you want it.
The gold and white finish here warms up an all-white kitchen without adding color you might tire of.
Lighting can transform your kitchen in an instant. Try stylish cluster pendants over a dining table or breakfast bar for a statement look.
6. Install a Backsplash

A backsplash protects the wall where sauce actually splatters and gives you a chance to bring in color or texture without committing to a whole room.
The photo uses dark blue glass subway tiles behind a light counter, which reads as intentional contrast rather than default white.
Glass tile reflects light, a real help in a kitchen with limited windows, but it shows every fingerprint during install and needs patient cleanup once the grout goes on.
The missing outlet cover is a reminder: cut tiles around your outlets before you mix thinset, and turn the breaker off to those boxes.
I would use a medium gray grout with this blue instead of white, white grout behind a cooktop stains within a year no matter what sealer you use.
7. Add a Kitchen Island

An island turns a kitchen from a corridor into a room you actually stand in.
The waterfall edge on the visible one reads as stone all the way through, though I would check whether that slab is solid or a built-up edge on a standard thickness; the look is the same, the price is not.
Before you commit, measure your aisles.
You need 36 inches minimum on all working sides, 42 if two people cook together. The overhang for stools eats another chunk of depth, so a narrow kitchen quickly becomes cramped once seating goes in.
I would skip storage on the seating side and put drawers facing the cook; that is where you reach all day long.
8. Upgrade Appliances

A refrigerator with a water dispenser in the door tells me someone prioritized convenience over energy numbers, which is a valid choice if your household goes through filtered water fast.
A glossy black finish resists fingerprints better than classic stainless, but it can be harder to match later if one unit dies before the set.
I would check whether your current cabinets are built around a standard refrigerator opening; older kitchens often run smaller, and squeezing in a larger unit means losing the surrounding trim or rebuilding the box.
Measure the depth too, a counter-depth unit sticks out less but holds less.
9. Install Floating Shelves

Corner shelves use dead space that cabinets never reach properly. The visible ones are wood against subway tile, a combination that works because the materials are already elsewhere in the room.
The brackets are the part you need to get right.
Concealed floating hardware keeps the lines clean, but it needs to hit studs or heavy-duty anchors rated for serious load; pottery is heavier than it looks, so I would not stack the shelf as full as I might with an L-bracket.
I would not install these above a cooktop, open shelves collect grease and dust where you store dishes. The ribbed glass on the upper cabinets nearby is a smarter place for everyday plates.
10. Knobs and Pulls
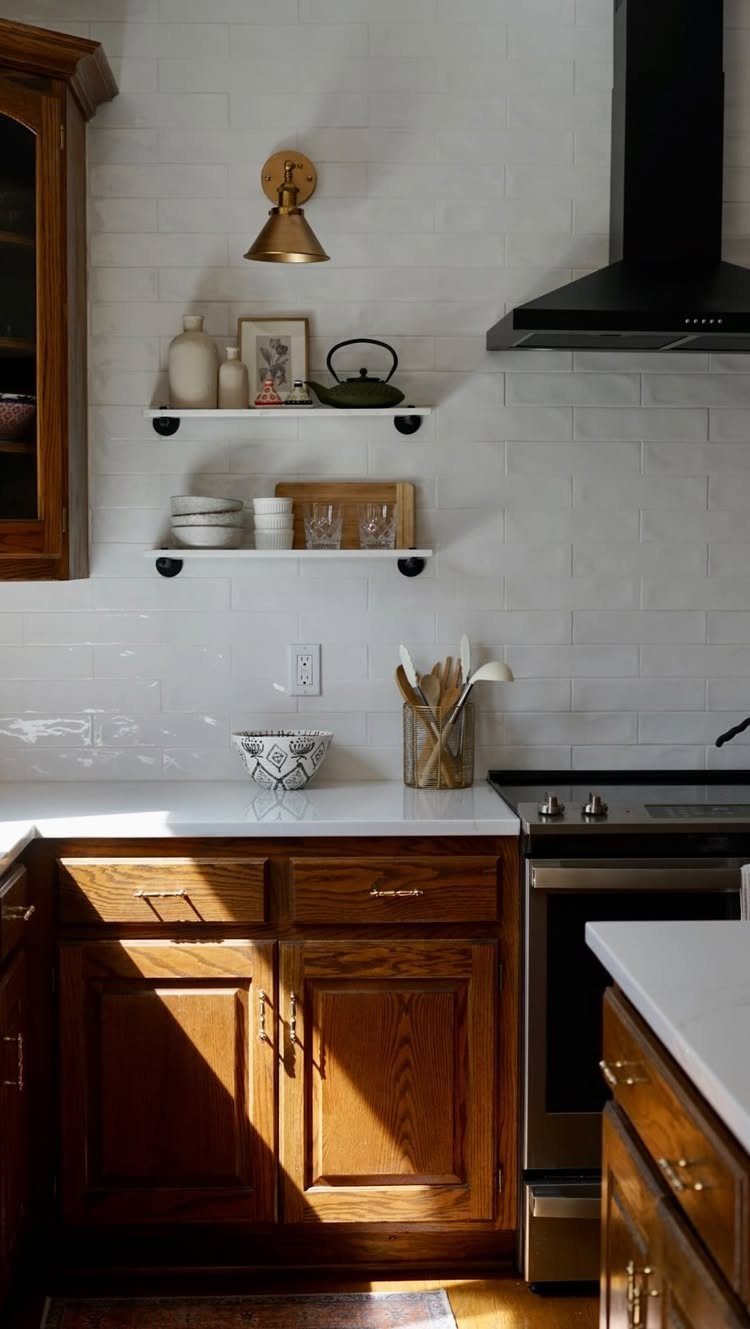
Brass hardware against wood and white tile warms the whole kitchen without introducing a new color.
The mix of knobs on doors and pulls on drawers follows how your hand actually moves; a pull is easier when you are holding a utensil.
The hole spacing on your existing drawers decides what you can swap to without drilling new ones.
If you are switching from knobs to pulls, the old hole may sit awkwardly under the new length; a backplate covers that, or you fill and repaint. I would skip backplates on painted cabinets, they read as trying too hard.
11. Install New Sink and Tap

A tall arched faucet with a separate soap dispenser means you are planning to wash dishes and hands at the same station, which is how most people actually use a kitchen.
Undermount or drop-in changes what you clean. Undermount lets you wipe crumbs straight into the bowl, but the counter edge takes the water beating instead of the sink lip; stone counters need sealing more often with an undermount.
The dark stainless here is a finish, not a different metal, and it shows water spots less than polished chrome.
I would check whether your cabinet base can take the weight of a larger single-bowl sink full of water; the old double-bowl spread the load across 2 cutouts.
12. Install a Range Hood

A wall-mounted hood in stainless steel vents outward, which is the only setup that actually removes cooking grease and moisture from the house.
Recirculating hoods blow it back through a filter, better than nothing, but your cabinets still get sticky over time.
The duct run matters more than the hood itself.
Straight up through the roof is ideal; a horizontal run to an outside wall needs rigid duct, not flex, and no more than 2 elbows or the airflow drops below what the fan rated.
I would size the hood to your cooktop width, matching the stove width at minimum, wider is better.
The crystal chandeliers nearby tell me this kitchen is for show as much as cooking; if you cook hard, a hood with baffle filters cleans easier than mesh.
Inspiration Sources
Pinterest and Instagram are where I start, but I treat them as raw material, not a plan. A saved photo tells me what color I am drawn to, not whether that finish works with my actual light.
I pin first, then sort by what I can execute: a 48-inch stove is a beautiful anchor if your space and budget allow it, but starting there means every other choice bends to fit it.
A physical board beats a digital one for seeing clashes.
I tape paint chips and countertop samples to cardboard and live with them for a week; morning light and evening light read completely different. Showrooms help for scale; an island looks generous online and tight in person.
I would pick one element to build around, cabinets or counters, and let everything else answer to it. 2 competing stars fight each other.
Cost Considerations
A mid-range DIY kitchen still costs less than hiring out, with labor savings eating a solid chunk of what a contractor bid would run. That 20% is your margin for better materials or for mistakes.
I would split the budget before I spend anything: the biggest share to cabinets and counters, a quarter to appliances, a smaller slice to labor you cannot do yourself, and the remainder to fixtures and hardware.
That last slice disappears fast if you fall for a flashy faucet when a basic one performs the same.
A hundred dollars covers a weekend of small swaps, paint and hardware and a peel-and-stick backsplash, if that is your scope. Do not let a blog post convince you that is a full remodel.
I would rather do less and finish it than stretch thin and stare at half-painted doors into next season. Track every receipt; the total surprises you faster than you think.
Frequently Asked Questions
Can I do a kitchen renovation myself?
Yes, many homeowners handle their own kitchen renovations, though the scope you attempt should match your actual skills.
Basic carpentry, plumbing, and electrical knowledge covers a lot, but I would not gamble on gas lines or structural changes without a pro.
Painting cabinets, swapping hardware, and installing a peel-and-stick backsplash are weekend jobs that need no permit; moving a sink or running new circuits does.
Can I take a picture of my kitchen and redesign it for free?
Several apps let you upload a photo and overlay new cabinets, paint colors, or countertops to test ideas before you commit. I treat these as a starting point, not a plan, because screen colors shift and scale lies.
A physical board with actual paint chips and countertop samples taped to cardboard, lived with for a week in real light, tells you far more about what works.
Can I renovate my kitchen for $10,000?
A DIY kitchen is possible on a tight budget if you are ruthless about where the money lands.
A small stack of cash and a Saturday handles paint and hardware swaps, though that only freshens the surface, it does not rebuild the room.
What are some ways to update old kitchen cabinets?
Painting is the fastest transformation, especially with a bonding primer on laminate or a fresh coat on wood.
New knobs and pulls reward an afternoon of screwdriver work with a kitchen that feels completely different; brass on white adds warmth without committing to a color you might regret by next year.
Two-tone cabinets break up a solid wall of sameness, white above and something softer below, with hardware that ties the two together so it reads intentional, not accidental.