
Brick patio landscaping covers a wide range: from a weekend of dry-laid edging to a full outdoor kitchen with gas and water lines, and the deciding factor is whether you own the project or rent the space.
An outdoor fireplace needs code checks and possibly pad reinforcement; a half-buried brick edge stops grass rhizomes with nothing more than a shallow trench and individual leveling.
1. Outdoor Fireplace

A freestanding brick fireplace with a chimney turns a patio into something you use after sunset and past fall.
I would check 2 things before committing: whether your local code requires a setback from the property line, and whether the pad underneath needs reinforcement beyond what a standard patio slab provides.
A cooking counter built into the same structure saves you from putting up a separate prep area, though it does add both cost and complexity.
If you are already running gas for a grill, extending it to the fireplace is simpler than managing firewood storage.
2. Fire Pit

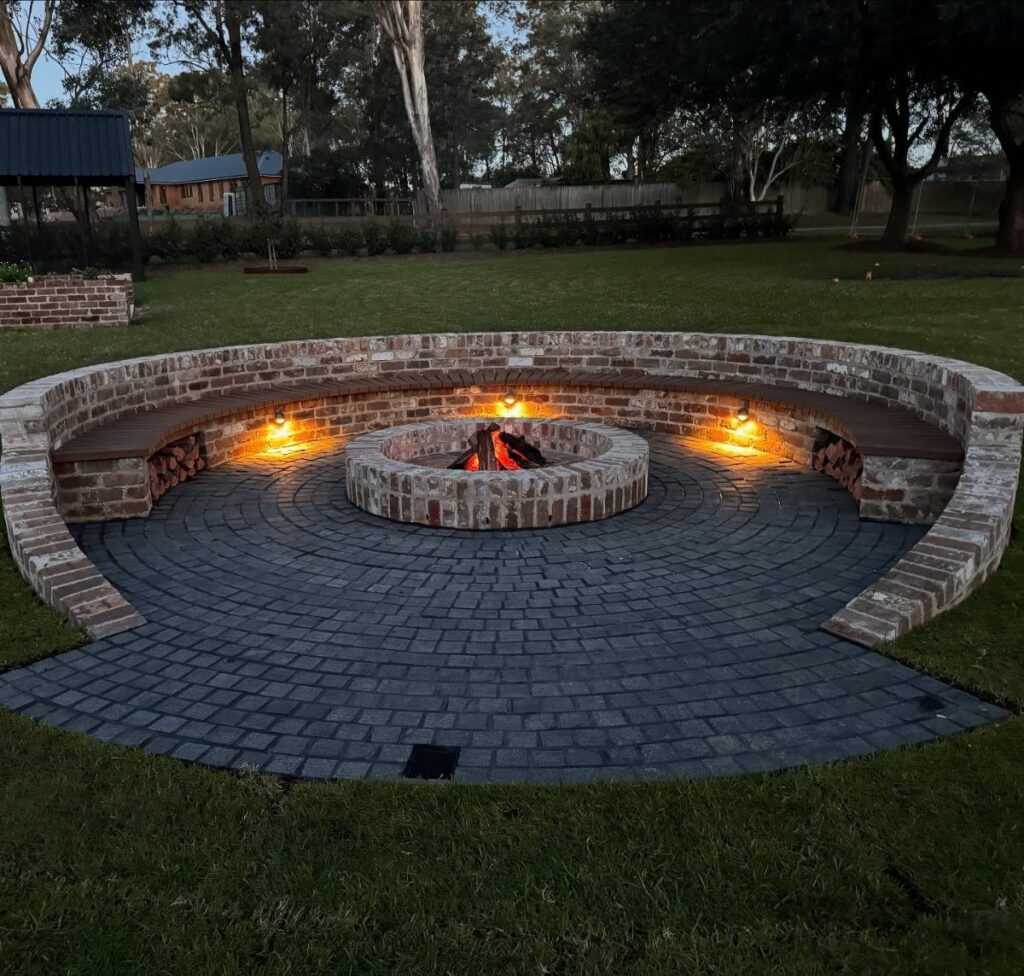
A sunken brick ring with a surrounding bench gives you seating, containment, and a focal point in one build.
I like the integrated approach because it keeps the lawn intact and defines the gathering space without fencing it off. Check your municipality’s rules on open flames and required distances from structures; some towns treat wood-burning and gas differently.
A gas line run during construction costs more upfront than a portable propane tank but removes the refill chore and the smoke variable.
3. Herringbone Patterned Brick Layouts

The herringbone pattern, with bricks laid at alternating angles, handles ground movement better than running bond because the interlock resists shifting.
I would use it anywhere frost heave is a concern, which is most of the US. A border course soldiered flat along the edge contains the field and gives a clean line against the grass.
Budget extra for cutting; every perimeter brick and any curve needs a trip through the wet saw, and the waste runs higher than with a simpler pattern.
4. Brick Planters & Raised Beds
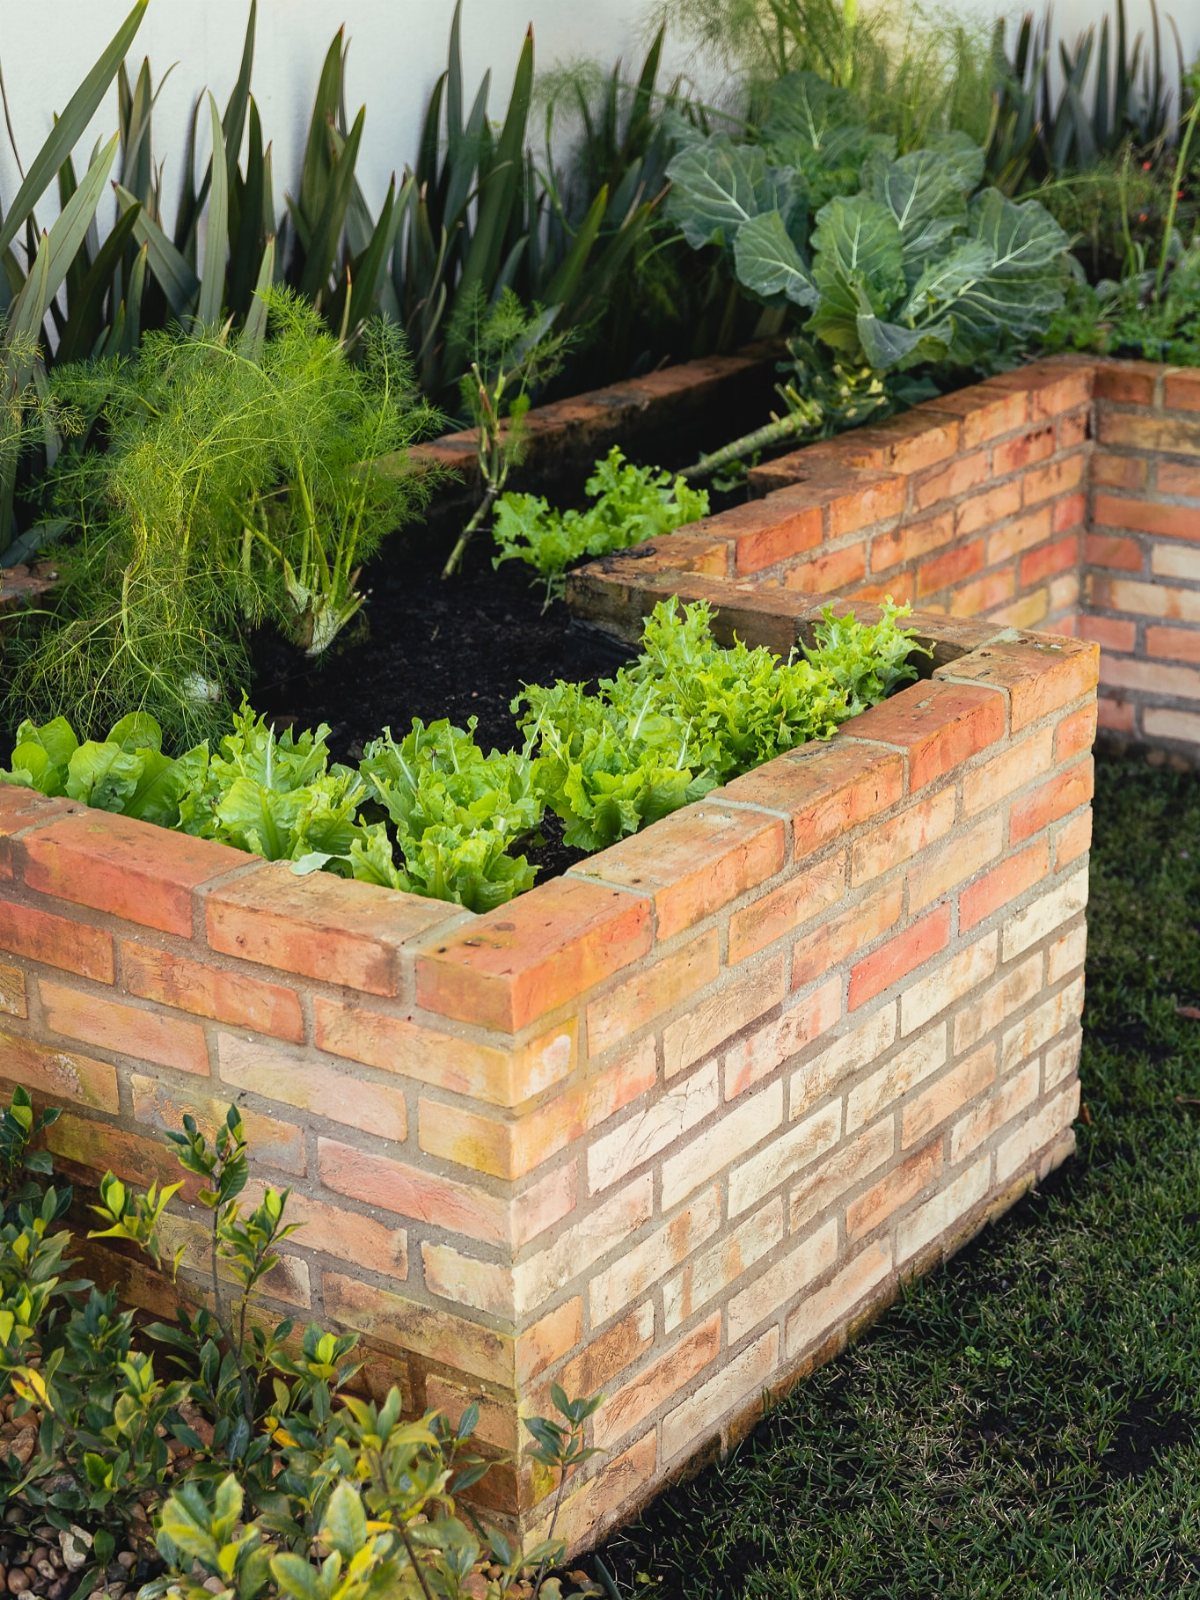
Raised beds built from brick warm the soil faster in spring and hold heat into fall, which extends your growing season by a couple of weeks.
I would line the interior with landscape fabric or a solid barrier if you are using salvaged brick; old mortar and fired clay can leach salts that some plants dislike.
Mixed red and beige brick is a nice way to use leftovers or seconds from a supplier. Cap the top course flat if you will sit on the edge while weeding; a sharp arris gets uncomfortable fast.
5. Wall Garden

Mounting planters on a vertical surface lets you grow where ground space is pavement, shade, or simply already spoken for. Wrought-iron holders are decorative but need regular inspection for rust if you are in a wet climate.
I would drill into the brick itself for any heavy planter or fixture, since mortar lacks the holding strength and crumbles faster under load.
6. Brick Pathways
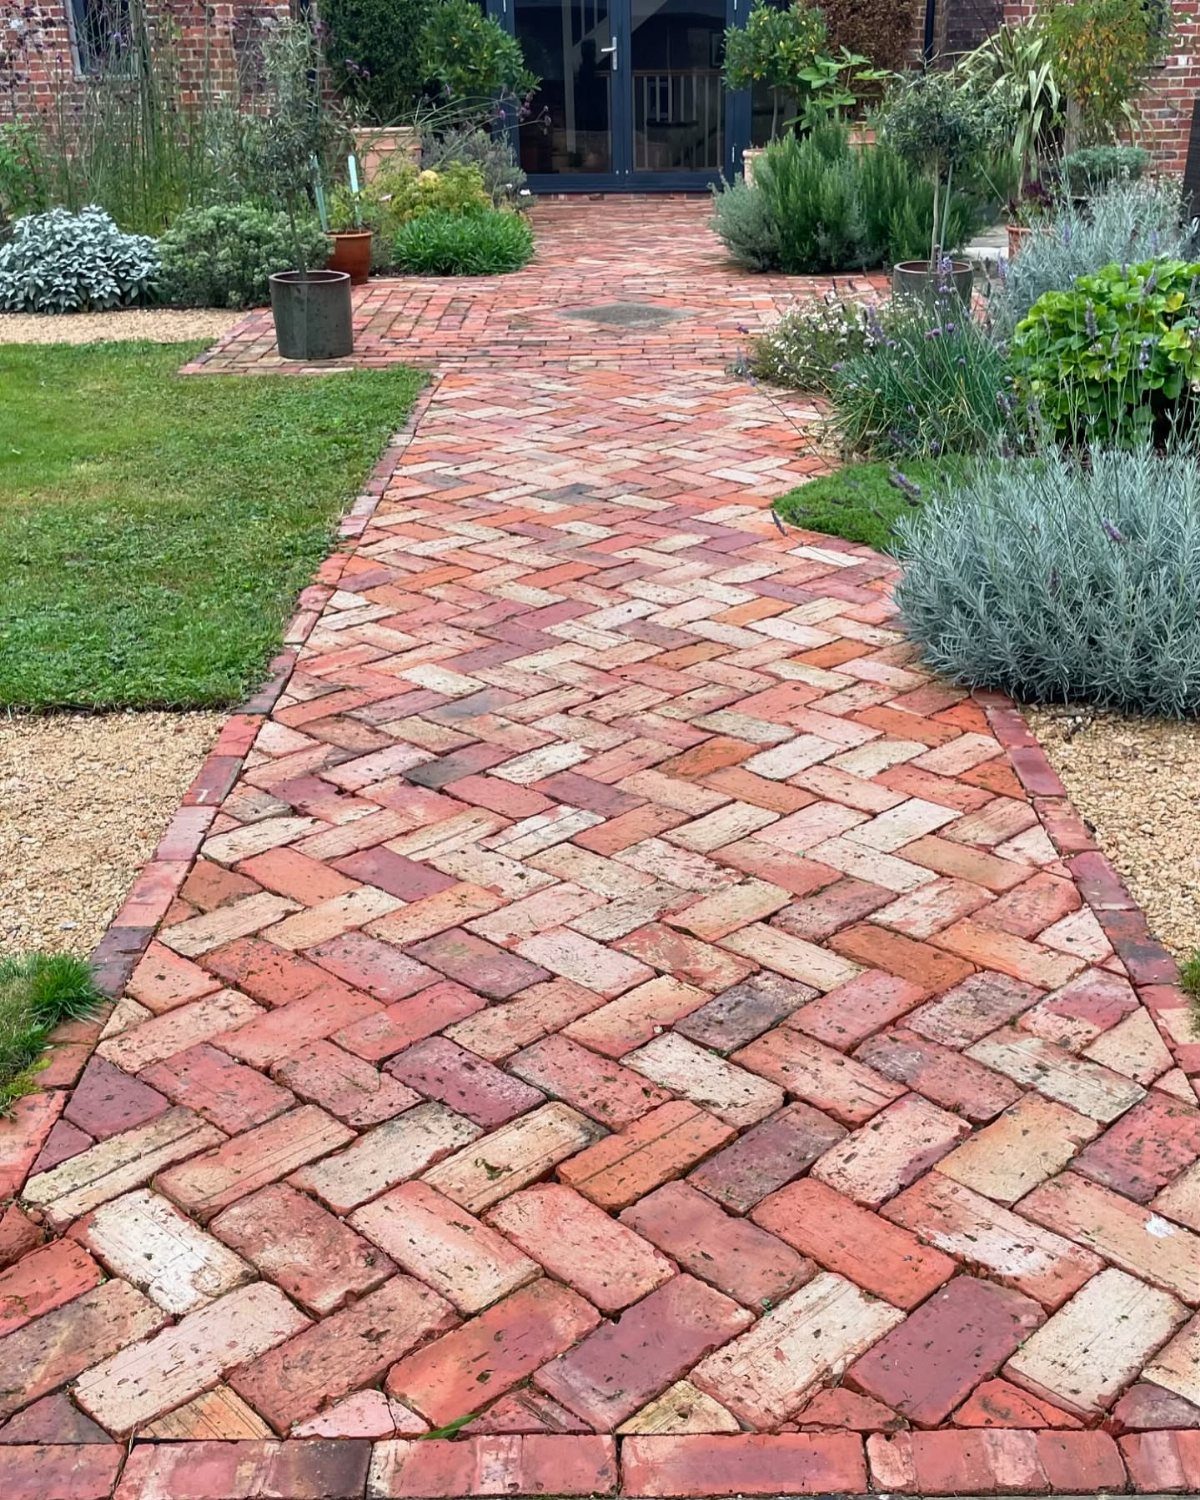
A herringbone brick path through lawn or beds gives you a stable walking surface that drains better than concrete and repairs one brick at a time.
I would excavate 6 to 8 inches for the base course of compacted gravel and sand; less than that and the freeze-thaw cycle wins in a few years.
Multi-colored brick hides dirt and leaf litter between cleanings, which matters more than most people expect. Edge with steel or another course of brick set vertically; without containment, the pattern slowly walks into the beds.
7. Retaining Walls

A brick retaining wall buys you level ground where the yard slopes and gives planting beds a clean backing.
I would check whether the height triggers a permit; many towns draw the line low enough that even a modest wall needs engineering, so call the building department before you dig.
A low wall can do double duty as a light mount and a planter edge, which saves building a separate bed frame.
Drainage behind the wall matters more than the face you see; without a gravel backfill and weep holes, hydrostatic pressure pushes it over in a few seasons.
8. Outdoor Kitchen & BBQ Area
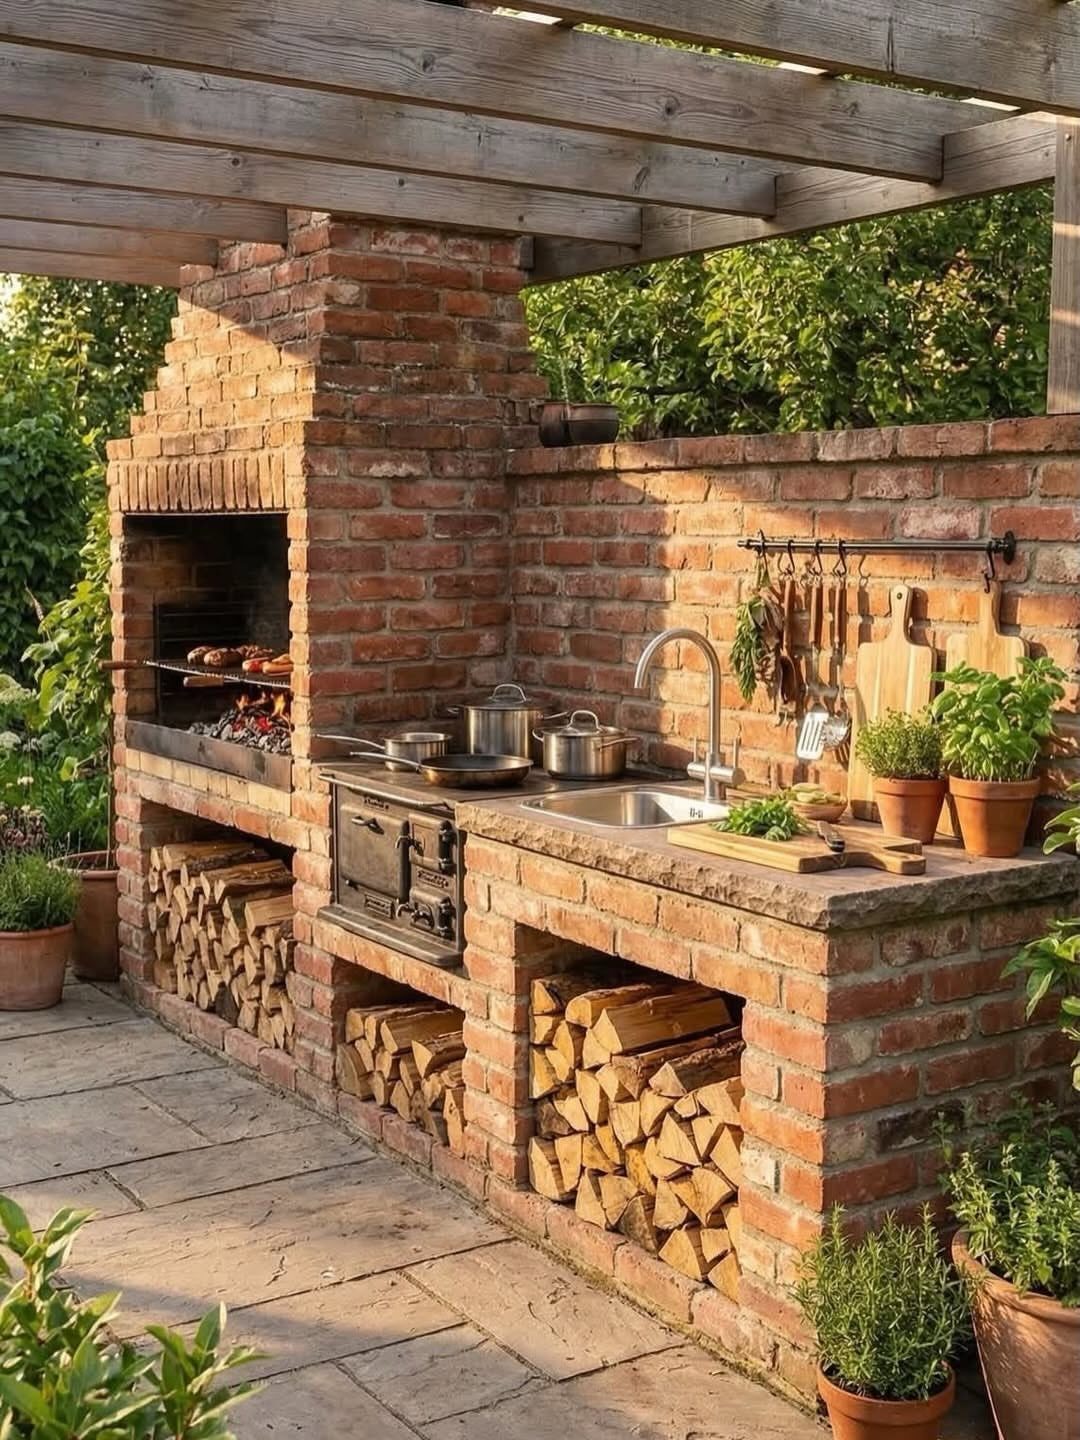
A brick outdoor kitchen under a pergola lets you cook and serve without running back inside for every tool.
I would decide on fuel before laying the first course; gas lines, wood storage, and charcoal each need different clearances and foundations.
The sink visible here means running water and drainage, which in most areas means frost-proof fixtures and a dry well or connection to the house system.
A solid roof overhead protects the cook but adds to the permit load; an open pergola like this one skirts that in many towns.
9. Built-in Curved Brick Bench

A curved brick bench built into the patio edge gives seating that does not shift or rot and frames the space without blocking sightlines.
The wooden seat slats visible here are kinder on the back than brick alone and faster to replace if they weather.
I would plan the radius before ordering; a gentle curve uses standard brick, but a tight one needs custom cuts or smaller units.
Integrated planters at either end hold enough soil for climbers like bougainvillea, which softens the masonry without eating into floor space.
10. Brick Garden Edging

Brick edging keeps lawn and bed separate with a line that stays crisp longer than plastic or timber. Set on edge and half-buried, brick stops grass rhizomes and gives a clean surface to mow against.
I would dig a shallow trench and level each brick individually rather than pouring a continuous footing; freeze-thaw will heave a rigid base, but loose-laid brick adjusts.
Salvaged brick works here since the look is informal, though matching heights saves tripping and trimming headaches.
11. Brick Patio Steps

Wide brick steps with mixed tones handle the transition from grade to door without the formality of poured concrete.
The angled layout visible here slows the rise and gives planting pockets at the edges. I would keep the run generous and the rise low for comfort; a steeper pitch feels like a ladder in wet weather.
Multi-colored pavers hide the mortar and the inevitable leaf stain better than a single shade, which matters on a surface you will sweep but never power-wash weekly.
Choosing the Right Material
Common brick and face brick serve different jobs on a patio. Common brick is rougher, cheaper, and structurally sound; face brick carries a smoother finish and tighter color range, which you pay more for.
I would use face brick only where the surface is visible and the budget allows, since both last equally long once laid.
The real color decision comes down to whether you want the patio to read as one tone or many.
A checkerboard of 2 colors reads formal; mixed reds and beiges from seconds or salvage read casual and hide dirt. Brick color does not fade, so the choice you make now is the one you live with.
Pattern matters for installation cost as much as looks.
Running bond is the simplest to cut and lay; herringbone takes more saw time and more waste but handles frost better. Circles and freeform curves look good on paper and cost more in labor and brick.
Cost-Effective Design Ideas
Gravel mixed with brick stretches the material without looking cheap. I would run brick as the walking surface and gravel as the border or infill between seating areas; you get the texture of both and buy less brick.
Reclaimed brick cuts cost and gives variation in color and wear that new brick cannot match.
Check that the batch is roughly uniform in height; mismatched sizes make leveling slow and the surface uneven. Salvage from a single demolition is easier to work with than a mixed pile.
A sand and gravel base lets a homeowner install dry-laid brick without concrete or a crew. Frost heave shifts the field over time, so you will relevel every few years; that is the movement you accept for the lower cost.
That repair is simple, though; lift the brick, add sand, and tap it back. A concrete slab underneath costs more upfront and locks the pattern in place.
Maintenance Tips
Brick needs little regular work, which is why I like it for a weekend-built patio.
Sweeping and occasional hosing handle most of it. Sealing every 3 to 5 years is the main scheduled task; it blocks salt damage, acid erosion, and the algae that turns brick green in shade.
Efflorescence, that white powder that blooms on new brick, looks alarming and usually fades on its own.
A soap-and-water scrub speeds it up; persistent haze needs a remover made for the job. I would not seal over efflorescence hoping to hide it; the seal traps the salt and the haze stays.
Dry-laid brick repairs one unit at a time, which is a real advantage over concrete. Lift the offender, relevel the base, and set a replacement.
No saw cutting, no patching compound, no color match problem. That ease is part of what makes the sand base worth the occasional releveling.
Frequently Asked Questions
How do I prepare a stable base under broken bricks?
I dig down 6 to 8 inches for a packed gravel-and-sand base, the same depth I’d use for any new walkway.
Less than that and freeze-thaw will heave the repair in a few years. Pop out the broken brick, add fresh sand to even the bed, and press the new one in.
For planting directly in the patio, go 12 to 18 inches deep; if the soil stays wet, start with a gravel drainage bed before adding dirt.
Is a brick patio more expensive than pavers?
Brick runs about $5 more per square foot than concrete pavers, so yes, it costs more upfront.
The gap narrows if you use common brick or salvage, and I think the repair advantage of dry-laid brick pays back some of that difference over time.
You lift one unit and fix it; concrete needs saw cutting and patching compound.
What is the cheapest patio material to use for a DIY project?
Concrete pavers are the cheapest upfront, but common brick is close and I would pick it for a project I am building myself.
Dry-laid brick on sand and gravel skips both concrete and hired labor; mixing in gravel as edging or filler spreads the brick further.