The ideas below run from a weekend kit build to a multi-day carpentry project with salvaged windows, so your budget and how much cutting you want to do will steer the choice.
A kit’s light frame goes up in an afternoon and costs less than a weekend project budget, while salvaged windows demand more joinery but cost only the time to collect them.
1. Greenhouse Frame
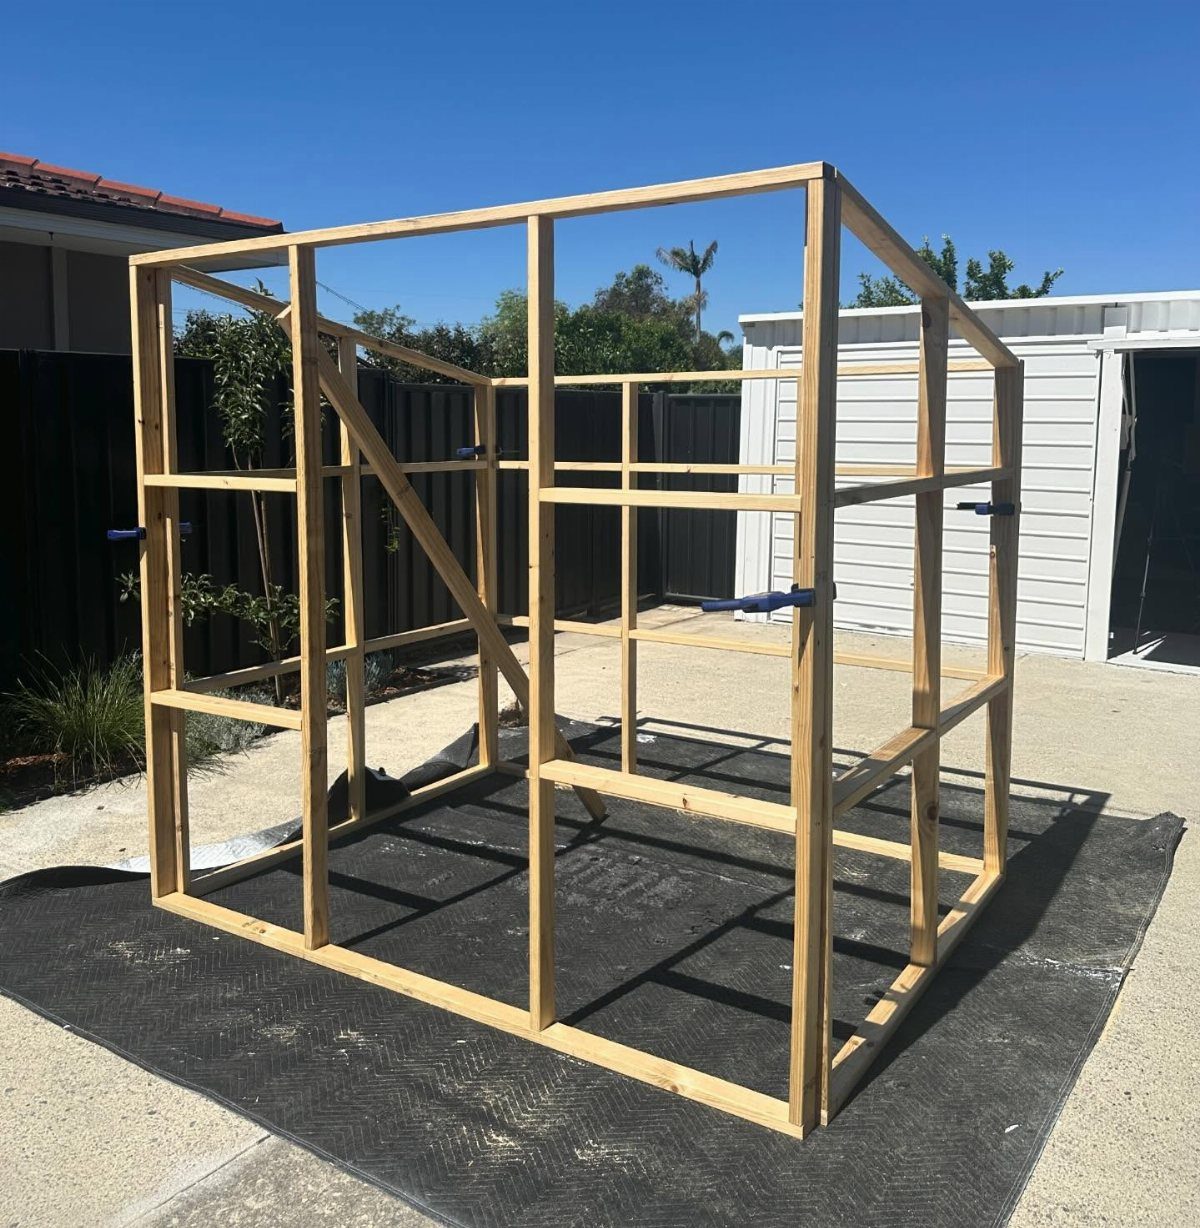
A wooden frame is what everything else hangs on, so the wood and the joints matter more than the covering you pick later.
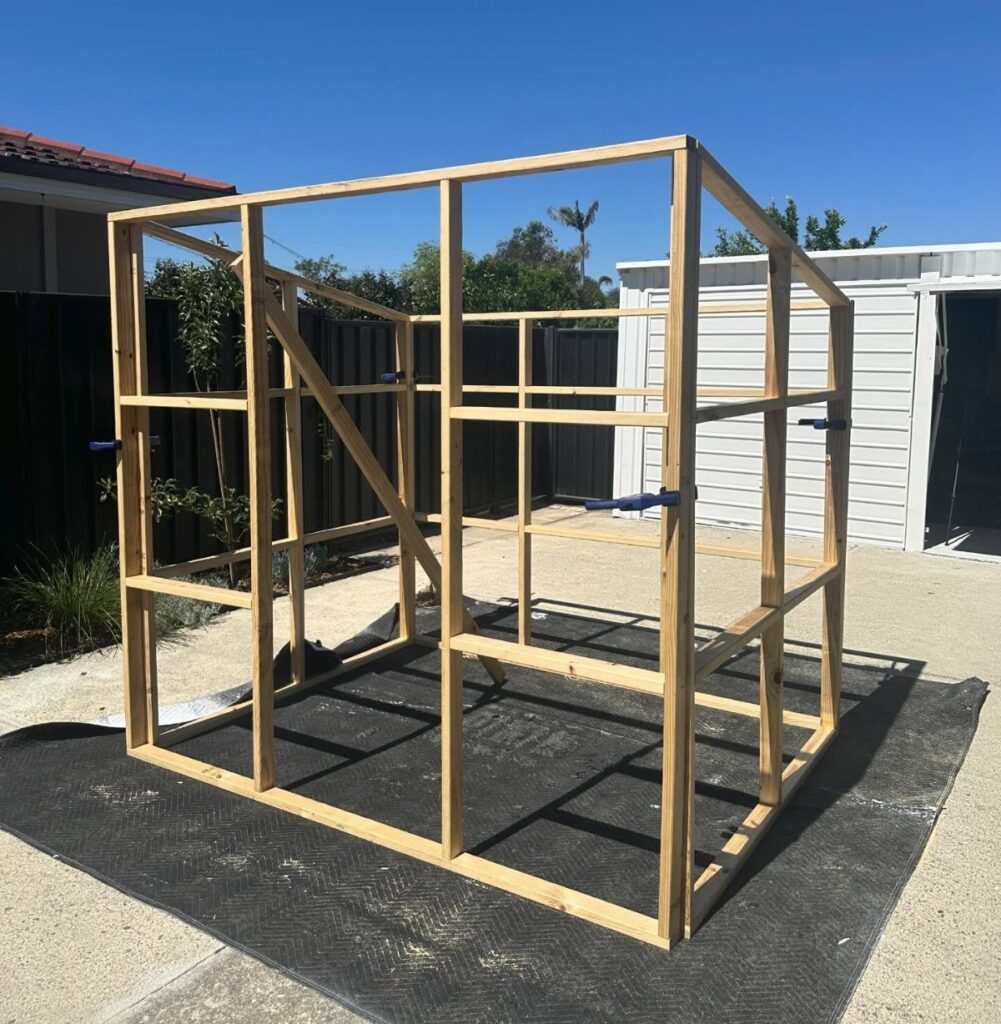
A frame clamped together on a black foundation mat lets you work flat and level before standing anything up.
I would check that the base is square now, while clamps still let you shift things; once the covering goes on, a twisted frame stays twisted.
Pressure-treated 4x4s or cedar hold up against ground moisture, though cedar costs more and weathers to gray faster than I usually like.
2. Salvaged Windows
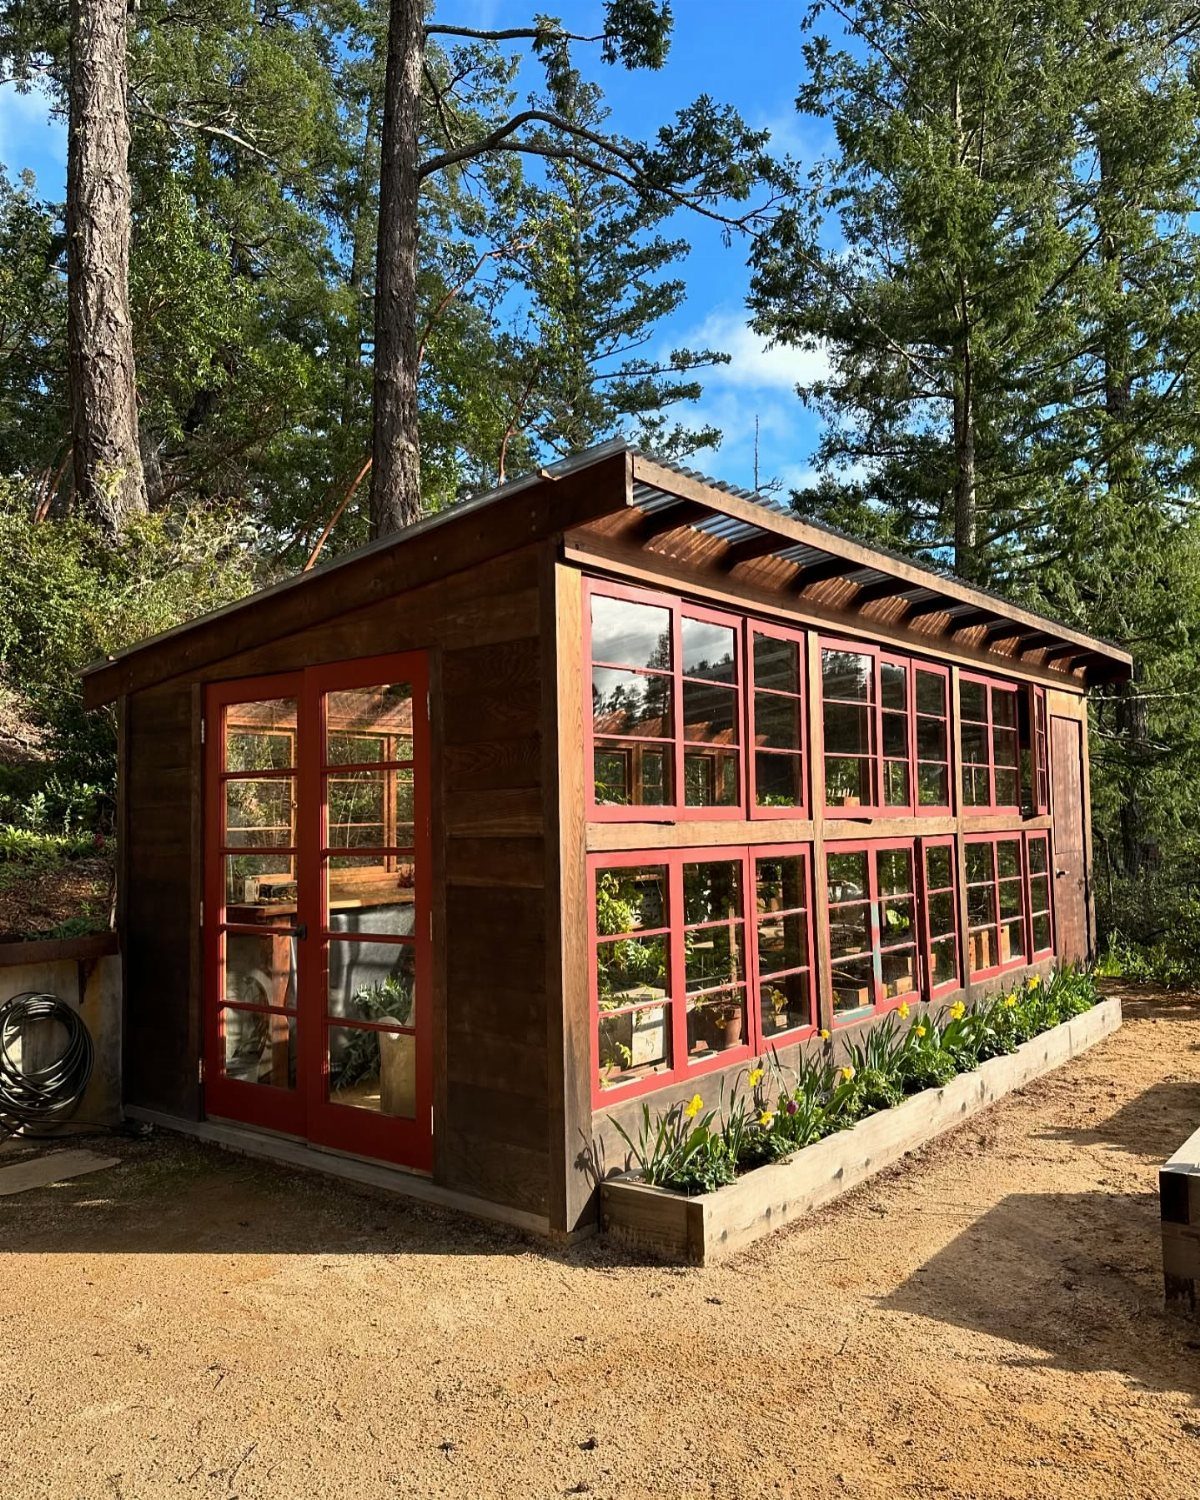
Salvaged windows give you glass and frame in one piece, but the sizes you find will dictate the wall dimensions rather than the other way around.
I would collect windows first, measure each rough opening with a half-inch gap for shimming, then cut studs to fit. Mismatched frames painted one color unifies them; the red here is a choice that reads as deliberate rather than patched-together.
3. Assemble a Pre-purchased Greenhouse Kit
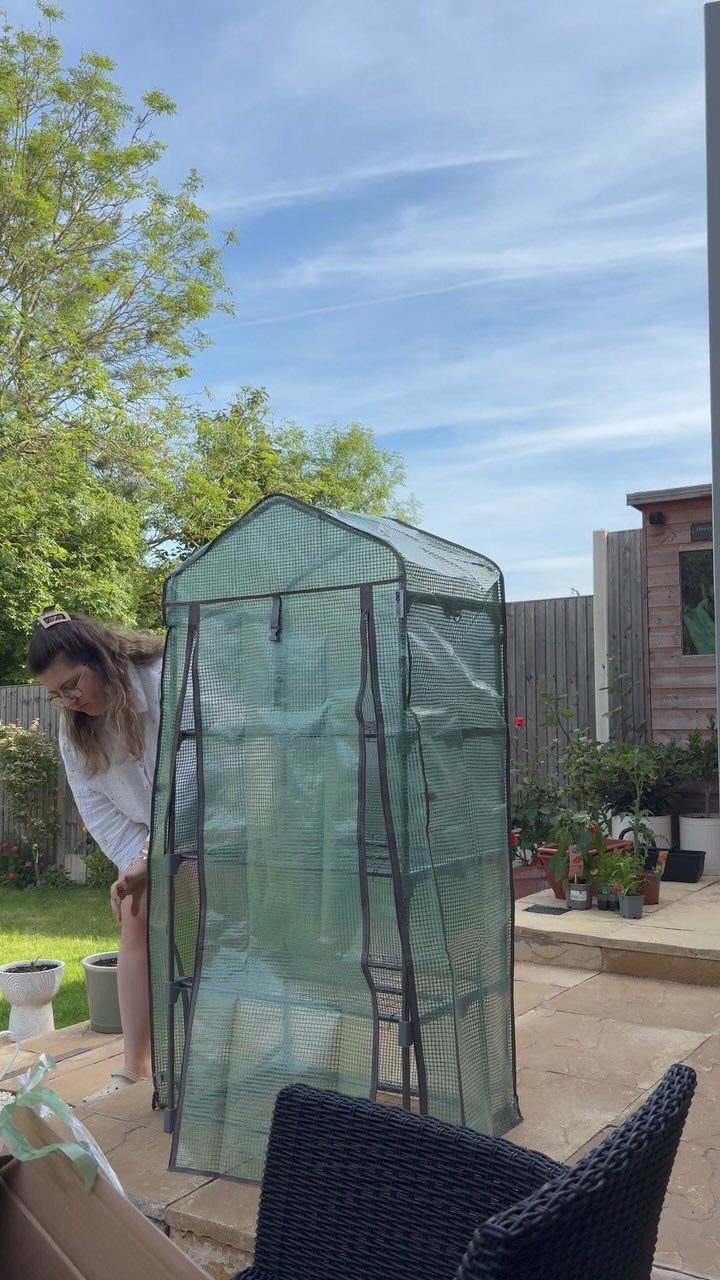
A kit ships with every joint and clip accounted for, which suits anyone who wants the decisions made before the weekend starts.
Stone patio underneath a kit’s green plastic tiers means the site already drains well; check that your own spot offers the same, since a kit’s light frame won’t tolerate much racking on uneven ground.
Assembly runs faster with a second pair of hands, especially when snapping the roof panels into place. Most kits in this range go up in an afternoon and cost less than a weekend project budget.
Buying a greenhouse from a supplier, then assembling it yourself can save you hundreds of pounds on construction costs – and the bigger the structure, the more you’ll save. You could also save on ground levelling, building foundations and laying paths inside the greenhouse.
4. Building a Mini Greenhouse
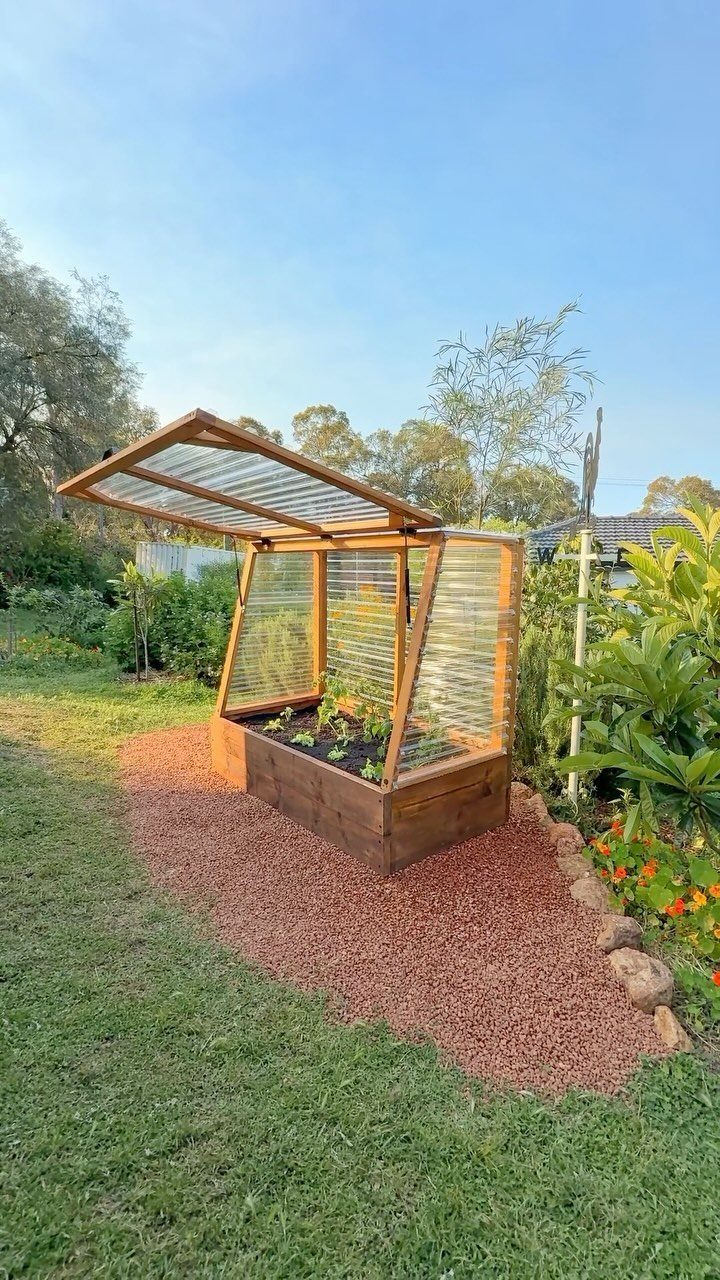
A mini greenhouse on a raised bed lets you start seeds earlier without giving up lawn space.
The corrugated plastic top is light enough to lift with one hand, which matters more than I expected once you are reaching in daily to water.
I would hinge the lid to the back so it catches the south sun when open and does not block the bed.
Cedar or redwood for the box resists rot; plastic sheeting usually comes in standard sheet lengths, so plan the width to match and cut waste.
5. Greenhouse Door
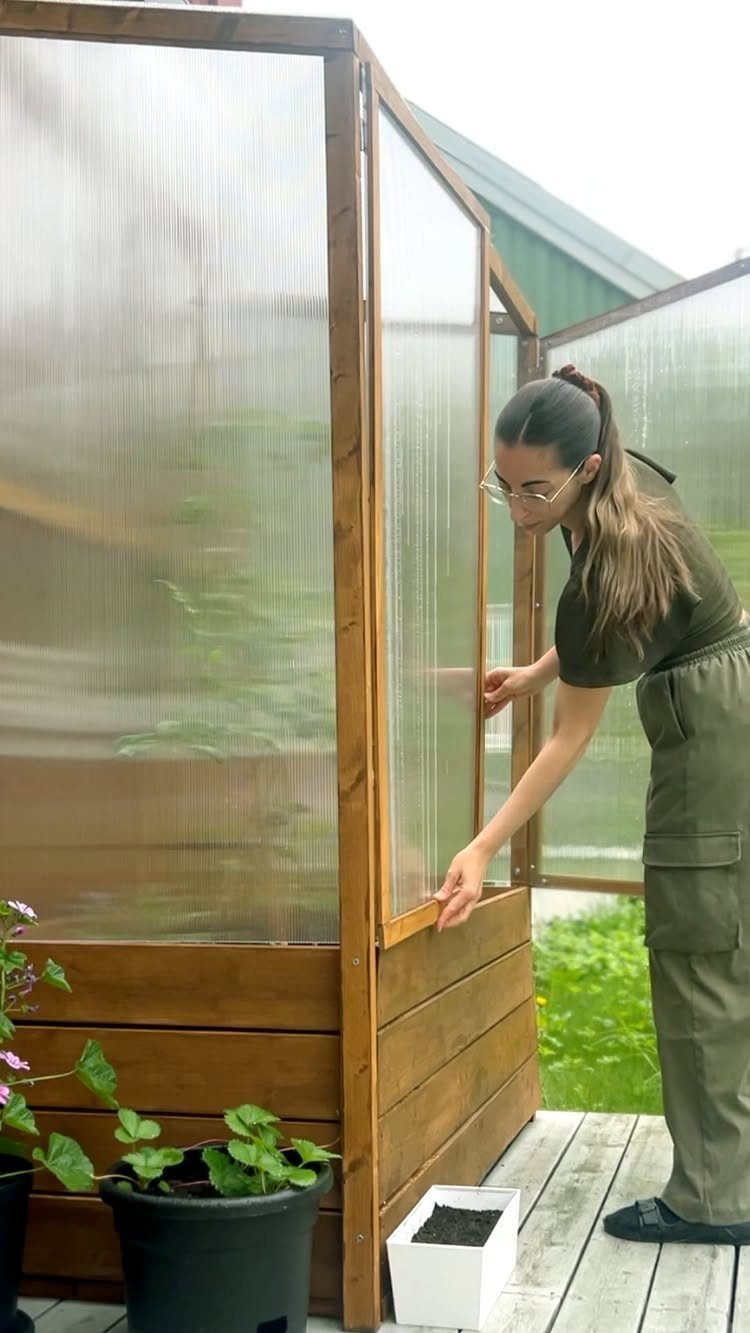
The door is where heat escapes and where you will bump your head carrying trays, so the swing direction and the seal both deserve thought.
A hinged polycarbonate panel on a wooden frame keeps the weight down and lets light through; check that the hinges are screwed into the frame, not just the siding, since the stress of opening against snow load or warping adds up.
A magnetic catch or simple barrel bolt holds it closed; weatherstripping along the jamb is worth the small cost if you are heating the space at all.
Greenhouse Benefits
A greenhouse buys you months on each end of the growing season. In zone 5a and similar, that means starting seeds while frost still sits on the ground and keeping herbs and leafy greens alive past the first freeze.
Tomatoes and peppers carry through summer heat that would stop them outside, provided you manage the temperature swing.
That swing is the part that needs attention. Summer sun can push a greenhouse past what most plants tolerate before stress sets in, so ventilation matters as much as the glazing you choose.
Vents and a circulation fan are not extras; they are what keeps the space usable in July. In winter, a small electric heater, heat mats under trays, and grow lights extend the season for those who want year-round harvests.
The cost of running them is modest for a structure this size, and far below what a commercial greenhouse demands.
Cost Considerations
Building from a kit rather than buying assembled saves the most on larger structures, where labor markup is highest.
For a small home build, the real savings are in skipping site work you can handle yourself: leveling, laying a simple foundation, and cutting paths from gravel or pavers you source locally.
Salvaged windows cost only the time to collect and the paint to unify them, though they demand more carpentry than a kit.
Time and money pull in opposite directions on this project, and either path stays below retail if you handle the assembly yourself.
Extra hands make the build go faster, and lifting roof panels or glass is the moment you will want them most.
Check every part against the packing list before you start. Missing a bracket on Saturday evening means waiting until Monday.
Maintenance Tips
Clean the glass or plastic at least once a season. Algae and dust cut light transmission more than most gardeners notice, and a dull film in March costs you the early growth you built the house for.
Ventilation is daily work in summer, not a setup task you finish. Rooftop vents, side windows, and a fan keep air moving and humidity from climbing into the range where mold and fungus start.
I would check thermometers at bench height and up near the ridge; the difference between them is often 10°F or more on a still day.
Pest checks belong in the same routine.
A closed space lets problems multiply fast, so I would look under leaves and along stems each time I water. A small greenhouse shows trouble early, which is an advantage if you use it.
In winter, an electric heater with a thermostat keeps the structure from freezing solid.
Wood or oil heaters work but need venting for combustion gases; electric is simpler for a space this size. Open everything you can once temperatures stay above 50°F outside; the structure will overheat faster than you expect in April sun.
Frequently Asked Questions
Do greenhouses work in winter?
Yes, a greenhouse extends the growing season on both ends, including through frost. Running them costs me maybe $30–50 a month in deep winter, nothing like the fuel bill for a commercial operation.
How can I build my own mini greenhouse?
For the box itself, I would use cedar or redwood; both stand up to wet soil without pressure treatment.
Corrugated plastic weighs almost nothing, so I can lift the top with one hand while I hold a watering can in the other. Plan the width to match standard sheet lengths for the plastic sheeting, and cut waste.
Is it better to buy or build a greenhouse?
Where labor markup hurts most is on bigger footprints, so that is where building yourself pays off.
On a small home build, the money I actually keep is from doing my own site work: leveling the ground, laying a gravel or paver foundation with local stone, and cutting simple paths.
Retail pricing assumes they send a crew; handle the assembly yourself and either route stays cheaper.